Showing posts with label lunch. Show all posts

Tuesday, January 10, 2012

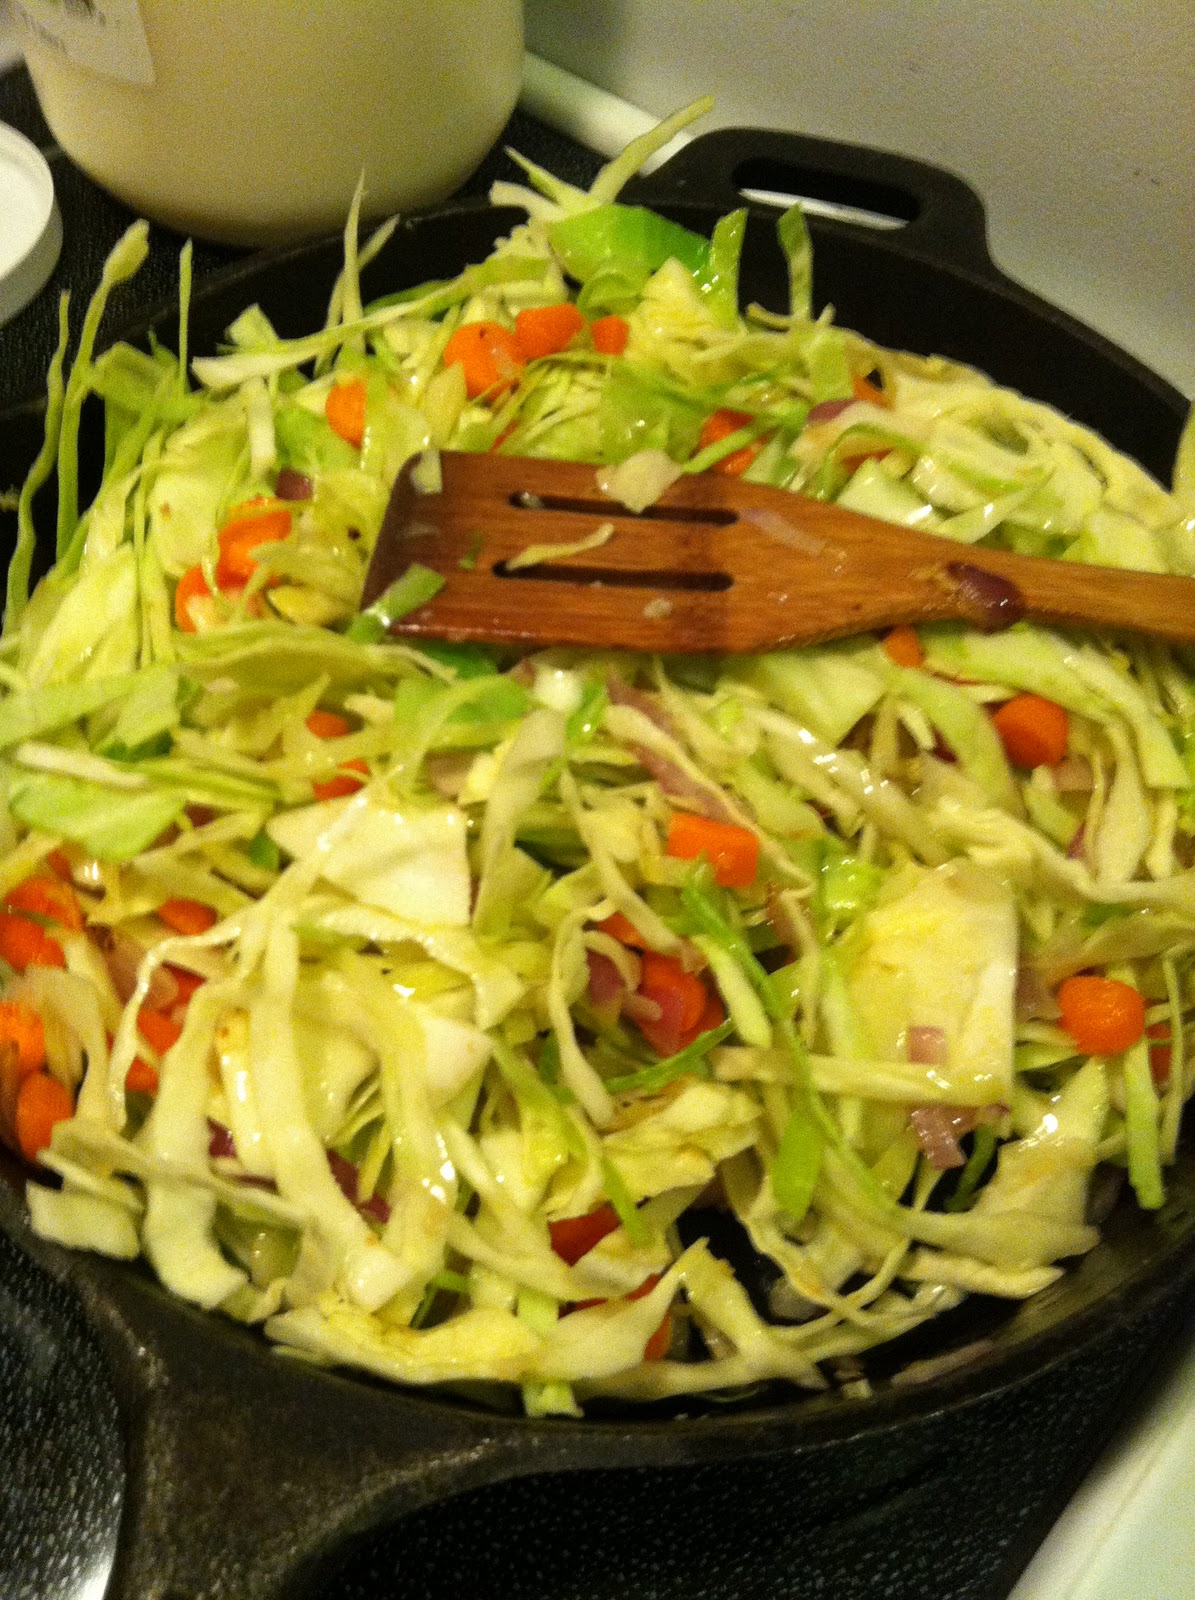
Cabbage and Rice

 Saute the onion and garlic for about 5 minutes...
 Then add the shredded cabbage and sliced carrots....
 Cook til desired doneness...
 Yummy!  I made a sauce to pour over the top...
 Serve on top of rice...  :)


I tried for the whole month of December to do no meat and no milk products for any meals.  I wanted to see how I felt and how the kids were acting by not giving them the meat and milk products.  Ok, they got milk in the morning, but I stayed away completely!  I am pretty proud of myself too!

We don't normally eat a lot of meat anyways, so it wasn't a huge deal, but wanted to omit it completely! 

Yea, December what not the greatest month to do that "diet"!  haha!!  So I am trying to continue that for this month!  :)

This is really easy and very few ingredients, which makes it cheap, but tasty!  :)


Cabbage and Rice

Heat 2 TBSP coconut oil in skillet...  add chopped onions and garlic, stir and cook about 5 minutes.

Add 4 cups finely sliced cabbage and 1/2 cup chopped or sliced carrots.

Stir fry for about 5 minutes or until veggies are your desired doneness.

Add:
1/8 tsp paprika
1 tsp salt
dash of pepper
2 t soy sauce
Stir thoroughly until well blended and pour over the cabbage. 
Serve immediately over rice.

Enjoy!  :)

Granola Apple Slices


I like to do snack lunches for my kids.  It's easy, healthy and fast.  :)  I am not sure about you, but I like quick, easy and healthy, and if you can do all three at the same time, SCORE!  :)

Most days I don't eat lunch, so if it's a snack lunch, I'll munch on things as I make it for the kids.  The kids also like to help make their lunches!

I had made some granola this morning, then just put some natural peanut butter on some apple slices, then dipped the apple in the granola!  The kids LOVED this!  A different way to eat an apple and granola!

As you can see, I just added some fruit and the rest of the apple plus some leftover chicken. 

Easy Peasy!  :)

Saturday, November 26, 2011

Crock Pot Mac and Cheese

I don't know about you, but I LOVE using my crock pot!  I usually have a meal from that on Thursday.  We have SPEAR every Thursday from 2-3, so by the time we get home, I am not in the mood to get supper around and cook.  There are times I forgot to get it going, and we do something easy, but most times I actually remember to get something in there!  ;)

This is so easy, most recipes that are crock pot recipes are easy, if for some reason they aren't, I usually don't do them!  ;)

This will seem like a LOT of liquid, but the noodles really do absorb it all.

You could use this as a side dish, or as a main meal.  I actually did put some wings on the grill with this.

Pour milk in crock pot
Then a layer of noodles
Then a layer of shredded cheese
More milk, noddles and top off with cheese

Here it is...  It looks kinda like scrambled eggs, I probably will only use 1-2 eggs instead of 4 next time.  But it was still really good!


Again, it doesn't look like mac and cheese, but it's really good!
Give a try, super easy to put together and it tastes GREAT!!  It's alot healthy than those boxes of mac and cheese.  I haven't bought a box of mac and cheese for soooo long!  It really is way easier than you think to make, even if you aren't using a crock pot!  ;)


Crock Pot Mac and Cheese

1 pound noodles (whatever kinda you want, I used elbow- Infact I may have use more than 1 pound, I had a 2 pound box and used all but 1/4 of it... we eat alot... ;))
7 cups of milk
1 egg
4 cups cheese (I used sharp cheddar, cheddar and pepper jack)
Salt, pepper, and garlic salt to taste
1 tsp dried mustard

Grease crock pot VERY well! Scrambled the egg in the milk,  and add seasoning, then place a bit of milk in bottom of crock pot. Then add some noodles, then some cheese...  Repeat layer, and then put lid on.  Cook on low for 2-5 hours...  It took mine about 4 hours on low.

I stirred it after 2 hours of cooking, then again right before serving.  I did taste it to see how the seasoning was and if I needed to add anymore, but ti was fine...

Super easy! ;)

Wednesday, November 23, 2011

Turkey Wrap with Cucumber

REALLY easy lunch!!! I had some leftover cream cheese spread from Panera. I had asked for one little container of cream cheese, and they gave me this big huge whooping container. I said, I didn't order this, but they said, take it... I'm not sure if they had pity on me when they saw my 4 kiddos or not...? Or if they were really just being nice! ;) I just smiled and said thank you, and walked away with my big huge whooping container of cream cheese, 5 bagels and 4 kids! ;)

Now that I am getting back to the recipe... I know, you really wanted that little story! ;) I used my left over cream cheese, then cut up half a cucumber, stir that up, spread it on a tortilla, (you can use any kind you want, I used white, it's what I had... ;)), then slap a piece of turkey or ham or whatever floats your boat, then roll it up, cut it in half, serve with veggie or fruit and EAT!

I'm thinking pretty much any type of meat you want would work for this. I don't normally buy or have lunch meat on hand, but the kids love Lunchables...

I don't buy lunchables... A few reasons... There is NOT enough food in one to satisfy my kids... I would seriously prob have to get 3 of them to make them even somewhat satisfied... Two: I am not a big fan of processed lunch meat, but I do feed it to my kids, not all the time, but on occasion... Three: they are to stinkin' expensive!

So, we buy lunch meat, and I always have crackers and cheese on hand... so we make our own, and then I had all kinds of other healthy stuff to it, fruit, veggies, you name it...

So, that's why I have meat, In a nut shell, that's why I have lunch meat... ;)

This isn't the most healthiest meals, but there is some veggies in it, so take it for what it's worth! If you are looking for something different and fast and easy, then give this a try! :)


Cream cheese and cut up cucumber

Spread it out on a tortilla

Place a piece of turkey on top

Roll it up, cut in half and enjoy!


Turkey Wrap with Cucumber

4-6 oz cream cheese
half a cucumber, diced, and peeled
4-6 tortillas (I made 8 of these, so it just depends on much cream cheese filling you put in them and how much cream cheese you use...  ;))
turkey slices (one per tortilla)

Make sure the cream cheese is softened, then peel and dice the cucumbers and stir it in the cream cheese. Spread some cream cheese on a tortilla, then place a piece of meat on top.  Roll it up and cut in half and enjoy!
See, easy peasy!  Doesn't get much easier than that!  :)

Try it and let me know how you like it! :D

Friday, October 14, 2011

Four Bean Chili

Wow!  This was so good!  The seasoning was PERFECT!  The only bad thing, I didn't measure exactly how much I put in!  I KNOW what I put in, just not the amounts!  It really is also up to the person how much of something you like, less spicy, more spicy... 

I soaked 4 different beans last nite.  I just put it all in one pot, then cooked it.  SUPER easy!  It also makes it WAY cheaper! I got all the other ingredients (canned tomato sauce, a can of diced tomatoes) and then the green pepper was from the Farmer's Market.  I think I figured the whole crock pot of soup cost me right about $5, and I have leftover to use for tomorrow nites supper!  If I made enough I may be able to do ONE more meal!  Are you kidding me?  Atleast TWO suppers for a family of 6, for $5!  How COOL is that? 

I didn't measure out the beans, I just kinda guessed about how much I would need.  (In the recipe, I gave you exact amounts for using cans of beans)  I took black, white, kidney and pinto beans.  Just dumped them in a pot and covered with water overnight. Brought them to a boil and then dropped down to a simmer for 2 hours.  While they were cooking, I cooked my onions in olive oil, and then added the garlic once the onions were almost caramelized.  Dump those in the crock pot with the tomato sauce, diced tomatoes and a can of tomato soup.  I added a can of tomato paste and added some cans of water. 

Once my beans were done, I added them to my crock pot.  Let it simmer on low for the rest of the day!  Boy did it smell GOOOOOD when we got home from SPEAR, that was at 3:!5, I still had to wait a little over 2 hours to eat supper!  :(

I then mixed up some homemade corn bread, which I already posted the recipe. 

What a yummy fall meal if I do say so myself!  And cheap to boot!  ;)  I like cheap AND good!  :)

Let me know if you try this, or if you have any questions!  :)

 Up close of this delicious soup!!!  :D

I couldn't wait to try the first bite, I'm not lying, the seasoning was absolutely PERFECT!!!  :)

This was my Gramma's bowl...  I used it ALL the time when I was at her house, she used it ALL the time too!  I remember one time we got into a little "fight" over who was going to use it!  haha!!  ;)


Here it is with the corn bread that I made!  :)  Very good filling meal!  BONUS, we have leftovers for tomorrow nites meal!  Can't wait!  Baked potatoes with this yummy chili on top, then sour cream and cheese, yummy!!!  ;oP


Four Bean Chili

1 Tbsp olive oil
1 Large Onion, chopped
3-4 Garlic Cloves, minced
1 Lb Lean Ground Beef
1-15 Oz Can White Beans, rinsed and drained
1-15 Oz Can Kidney Beans, rinsed and drained
1-15 Oz Can Pinto Beans, rinsed and drained
1-15 Oz Can Black Beans, rinsed and drained
1-28 Oz Can Chopped Tomatoes with Juice
2-15 Oz Cans Tomato Sauce
2 Tbsp Chili Powder
1 Tbsp Cumin
2 Tsp Salt


Saute the onion in the olive oil until it's just beginning to caramelize.  Then add the garlic, more or less to your taste!  ;)
Place everything in the crock pot and turn on low for 8 hours. 
Serve with corn bread.  Or you could add some sour cream, cheese, chives to this as well...  But since I am going to serve this on a baked potato, I'll use those toppings for that!  ;)

Wednesday, October 12, 2011

Eggs in the Nest

Growing up my mom would make these!  LOVED them, but I was the one picky one that did NOT like "snot" in my egg!  It HAD to be cooked all the way through!  Something about snotty eggs, eww....  Oh wait, I take that back, my dad didn't like snotty eggs either!  ;)

I also remember my mom making these and if the egg broke, she would say, it's OK, I'll eat this one!  Very RARELY did she break one, but on the occasion that she did, she took the one with the cooked egg yolk.  It's no fun when the egg yolk is cooked hard, you can't dip your bread in it!  ;)

These are VERY easy to make!  My kids GOBBLE them down!  There are other names for it, but this is what I remember my mom calling it eggs in a nest!  :)  (it really should be egg not eggs....  ;))


Here I served it one nite for dinner with some hash browns.  I had a bag of hash browns in my freezer, so I just dumped some sea salt and Old Bay seasoning on it!  YUMMY!!!!  :oP

 Up close pic of the egg in the nest! ;)
Here it is, look at that yummy egg yolk!!!  We would eat it all, then take that piece of bread that was toasted in the pan, and scoop up all that yummy leftover egg yolk!

I don't season the kids eggs, but for my hubs and I, I add some SPIKE, I'm thinking Old Bay might even be good?

There really is no "recipe" for this, so I'll just tell you what you need below!


Egss in the Nest

One egg person
One piece of bread per egg
Salt, pepper, spike, or any other seasoning you like
Coconut oil or butter

Take one piece of bread and use either a small cookie cutter (shape of your choice!  :)) or a small cup and cut out the middle.
Here's where you can do it 2 ways. This last time I just put some coconut oil in the pan, and then threw the bread in and then cracked the egg in the middle.
My mom (and I in times past) would butter the bread, I totally omitted that step, obviously, to save time.  I was being lazy and I wanted to see if it really made a difference.  I didn't notice a difference at all. So the choice is up to you which way you want to go!  Just make sure if you don't butter the bread, to put coconut oil or butter in your pan before each egg you make!  Or it will stick!

Ok, so chose one option, place bread in pan, then crack egg in the hole, season if you desire, cook for a bit, then flip.
I usually cook all the kids eggs in the nest first, then I go back and cook/toast their little pieces of bread.
Then I make mine and my hubs eggs.  ;)

Viola!  You are done!  How easy is that?  Super good, super easy, and can be made for breakfast, lunch OR dinner!  Score!!!  :D

For Valentines Day I used a heart cookie cutter to cut out the middle!  The kids LOVED that!  :)

Let me know what you think!  Have you ever had these before?  Do you call them something different?

Thursday, September 29, 2011

Peanut Butter/Chocolate Dip (or sunflower butter)


I could've eaten this whole batch! It was SOOOO good!  Even healthier if you use the natural peanut butter, but since I didn't have any, I used regular creamy! 
I'm thinking cashew and almond butter would be good, even sunflower butter for those who are allergic to nuts, that way they can enjoy this yummy goodness as well!

I served this with apples, banana and 2 graham crackers.  You could use strawberries, marshmallows, pretzel sticks, etc....  I used what I did since that's all I had!  ;)

Super easy to make, and actually pretty good for you, minus the chocolate sauce, but again, you don't "have" to add it...  It just gives it that little bit of chocolate kick which makes it taste even better!  ;)


Here is a bit of cream cheese, carrots, peanut butter and chocolate sauce

Mix it all up!  Ok, in the green bowl, it doesn't look the greatest, but then again it almost looks like a chocolate shake stirred up REALLY good!  ;)

Here's what I served it with, an egg puff (recipe coming SUPER soon, maybe tomorrow? ;)), that was their "lunch", graham crackers, banana, and half an apple cut into slices.

This lunch was not only EASY, it was GOOD and healthy!  Which y'all know I'm all about!  ;)  Easy and healthy!  That's what I like with 4 littles and 2 more coming!  :)

Peanut Butter/Chocolate Dip (or Sunflower Butter)

1-2 oz cream cheese (depends on how much you want, I use almost 2, but will use 1 next time)
1/2 cup natural creamy peanut, almond, cashew, or sunflower butter
1/4 carrot puree
6 tablespoons chocolate syrup
1/4 teaspoon salt

Mix all ingredients together until nice and creamy.  Keep in frig until ready to serve, or just start eating it right away like I did!  ;)  Give me some credit, I HAD to make sure it was worthy enough for the kids!  Just make sure you save enough for them!
Notice in the last picture, they only got about a heaping tablespoon full....  ;)  I am not gonna say if that's how much was left, or if I chose to give them only that much!  ;)

Seriously EASY and good!  Let me know how you like it! 

This would be a GREAT game nite snack, make a big bowl of it, serve it with graham crackers, cinnamon and sugar pita chips or tortilla crisps, marshmallows, pretzel sticks, apples, bananas, pears....  Yummy.....  :)

*Just a note, my kids were actually full after eating this and didn't ask for more.  Now, I am not sure if it was because I made them soaked oatmeal for breakfast, so that fills them up even more, or if the egg puff really did the trick with the other goodies!  ;)

Tuesday, September 27, 2011

Corn Confetti Quesadillas


LOVE the colors in this!  Not only does it look pretty and good, it tastes good!  :)

This is something that you could easily make a big batch of and just keep the extras in the freezer for a really quick and easy meal when you are short on time or just don't feel like cooking!  :)

The ingredients in this is probably items that you have all the time, and if not, they are REALLY easy and cheap to get!  I don't know about you, but I like easy and cheap!  ;)  But yet, it has to taste good!  ;)

I don't have an after picture because when I cooked these, my husband was out of town on a missions trip and he had the camera, and all I had was my phone, so this is the only picture I got!  I was to lazy to take pics as I went, but really, this is soooo easy!


Corn Confetti Quesadillas

2 cups fresh or frozen corn (I sued a frozen mixed, as in yellow and white, sweet corn, yummy!)
1 tablespoon butter
1/2 red bell pepper, diced
1/2 green pepper, diced
1/2 onion, diced
8 (9-10 inch) flour or wheat tortillas
8 oz Monterey Jack cheese, shredded

Heat skillet to medium-high heat, butter, corn, onions, and pepper and cook for 8-10 minutes, or until the onion is translucent.  Take out of skillet and wipe the skillet clean.

Lay 4 tortillas on counter and place 1/3 cup cheese on each one, then about 1/2 - 3/4 veggies on top of cheese, then add another 1/3 cup cheese.

Place tortilla in skillet, then place one of the remaining tortillas on top, press down with spatula to get out air pockets.  Cook until lightly browned and flip, do the same, cook until lightly browned.

Repeat until done...

Cut into wedges and serve immediately.

My kids also gobbled these down!  I think they ate 2 each of this one too!  ;)  Like I said, I think I am going to make a big batch of this and just put in freezer...  It will be easy enough to break apart what I need. 

I used the leftovers for a breakfast the next morning...  will have that posted tomorrow, so stay tuned!  ;)

Let me know if you made this, any changes, and how you liked it!

Oh, I remember what I did for mine, I didn't have enough cheese for all of them, so I put Pepper Jack cheese on mine, boy was it good and that extra kick!  Yummy!!!  :)

I should also mention, that I HARDLY EVER measure, so these are more like guesses...  If it seems like too much, then back off a bit, but if it isn't enough, add more!  You can't hurt it!  ;)

Wednesday, May 4, 2011

Pad Thai Wraps

This is a Whole Foods recipe. ;) Super easy and pretty good! Not my favorite, but will make it again! ;)


The 3 older kids ate 2 of these wraps! My youngest ended up digging out the noodles and eating them with his hands! ;) I don't want to say he is getting picky and only eats certain foods, but he kinda is! It could be certain textures too, I dunno. He does eat, so I am not complaining! :)


Take your tortilla


Place a nice big lettuce leaf on top...


Place your peanut sauced covered noodles on top of the lettuce....


Then add the peppers, bean sprouts and crushed peanuts...


Roll up and cut in half, dip in peanut sauce if desired!


Make as many as you need/want! :)


Pad Thai Wraps


1/4 pound angel hair pasta


1/4 cup prepared peanut sauce (plus more for dipping if desired)


1 tablespoon apple cider vinegar (I didn't have, so I used rice-garlic vinegar)


4 whole wheat or white tortillas


4-8 large lettuce leaves


1/2 cup thinly sliced red bell pepper


1/4 cup chopped, roasted, salted peanuts


2/3 cup bean sprouts


2 tablespoons chopped cilantro leaves


Make pasta according to package directions. Drain and pour peanut sauce and vinegar over top, mix to combine. Top each tortilla with lettuce, then divide pasta mixture on each tortilla, arranging it in the center. Top with peppers, peanuts, sprouts and cilantro and then roll up each one snugly, tucking in the ends halfway through. Serve with peanut sauce on the side for dipping.


*I didn't have the bigger tortillas, so I didn't tuck my end in! ;) Let me know what you think! It really is good! I didn't measure my pasta or my peanut sauce, I just dumped! ;)

Tuesday, May 3, 2011

Cilantro Lime Rice/Mexican Rice Bowl

Trying to come up with some really good, easy adn tasty recipes! But yet, cheap! We are trying to save every little penny around here and what better way by eating beans and rice, right? ;) But not just the normal beans and rice, tasty ones!

Ok, well, the kids and I could eat beans and rice all the time, but my hubs, he needed some extra spice for it! But it's all good! ;)

I think next time I make the cilantro lime rice, I will add a bit more limes, I didn't have enough, so I just used what I had! And maybe a bit more cilantro... ;)

I already had some black beans ready to go, so I just added all the other things to make a Mexican Rice Bowl... So you are getting 2 recipes in 1!!! :)

I thought I took pics of the rice and the Mexican bowl, but I guess i didn't!


Mexican Rice Bowl

Cilantro Lime Rice

Black beans

Diced tomatoes

Chopped cilantro

Avocado slices (I just took an avocado and mashed it up)

Fresh lime juice

Directions:

1. Add cilantro lime rice to a bowl or plate. Top with black beans, tomatoes, cilantro, and avocado slices. Squeeze fresh lime juice over the entire dish. Serve warm.

Note-I didn’t include ingredient measurements because I never measure. This recipe is that easy! I like to make individual bowls so everyone can have add their favorite toppings. Enjoy!


AND here's how to make the rice! :)


Cilantro Lime Rice


1 cup uncooked long-grain white rice
1 teaspoon butter
2 cloves garlic, minced
2 teaspoons freshly squeezed lime juice
1 (15 ounce) can vegetable broth
1 cup water
1 tablespoon freshly squeezed lime juice
2 teaspoons granulated sugar
4 tablespoons fresh chopped cilantro

Directions:

In a a saucepan combine rice, butter, garlic, 2 teaspoons of lime juice, broth and water. Bring to a boil. Cover and cook on low 15-20 minutes, until rice is tender. Remove from heat. In a small bowl, whisk together lime juice, sugar, and cilantro. Pour over hot cooked rice and mix in as you fluff the rice. Serve warm.

Makes about 3 cups cooked rice

(I tripled this recipe! And I didn't have any vegetable broth, so I just used all water.)
Going to be making this one again for sure! ;) Just a different flavor, but good! I also used jasmine rice for this. It's all I get anymore! :)
Enjoy!
Again, sorry that they aren't any pictures for these recipes! It's very colorful! :) You can also use chopped red onion in the Mexican Bowl! :) Really, for the Rice Bowl, anything could go! It's whatever you like and what you have on hand! :)

Saturday, April 30, 2011

Pizza Wheels

These were a HIT and so good! They weren't really hard to make, and the bonus, you don't have to wait to let your dough rise! :) I am always a bit unsure of making a dough that doesn't need to rise for my pizza, it just never turns out right, the dough seems too heavy. But this stuff was PERFECT!!! I doubled the recipe, but think for next time, I will have to triple it! ;)


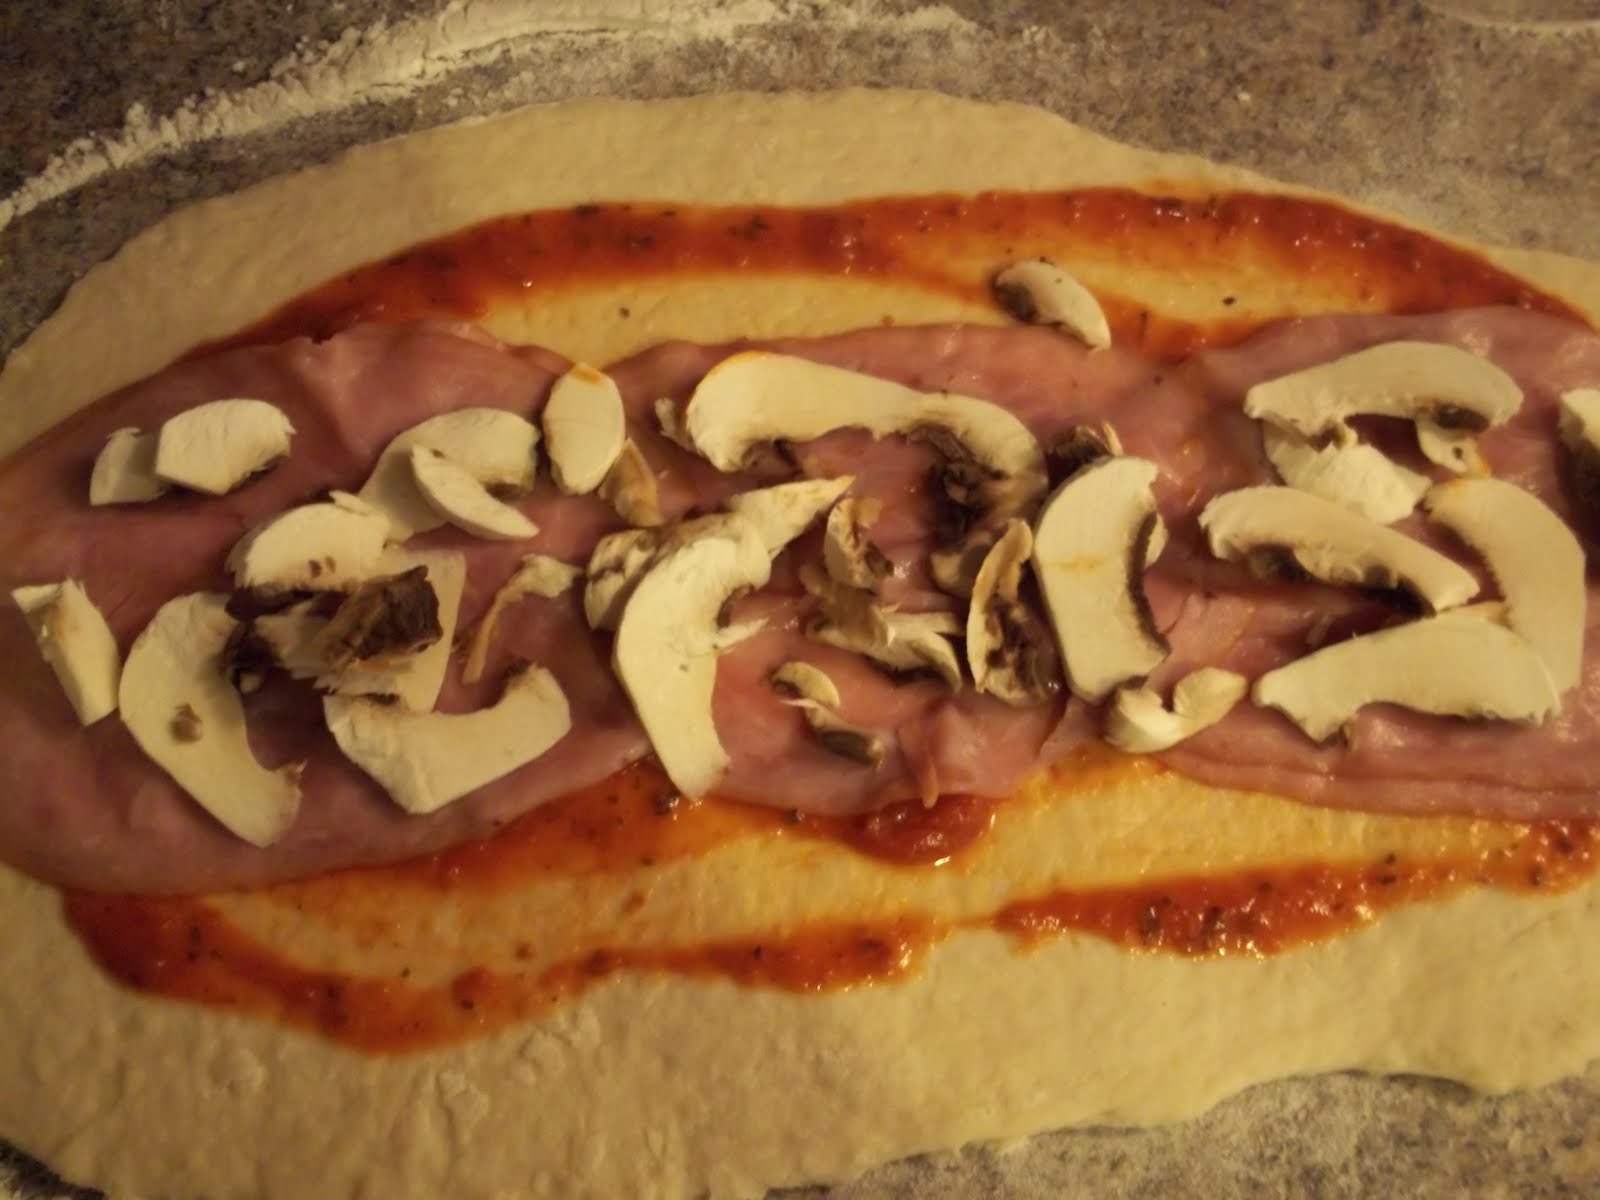
You can still make whatever flavors you want! I did a ham and cheese, a ham, cheese and mushroom, and then I did a spinach and cheese, oh, and I did a cheese one by itself. They all were so good!


I think next time I will add a bit of garlic salt to the dough. OR make a garlic butter dipping sauce, that would be soooo good!!! :D


This is a recipe that your kids could totally help you out with! The mixing of the dough, rolling it out, getting all the ingredients on the wheels and then rolling it up.


Oh, one thing to remember, I placed foil down on my pan, easier clean up, but I didn't spray the foil, you WILL want to spray your foil before placing your pizza wheels on it! It didn't stick too bad, but it would be easier to get off if sprayed! ;)


Take a part of your dough, in my case, this was a fourth of it... ;)


Roll it out into a rectangle, again, in my case, as best as you can! ;)
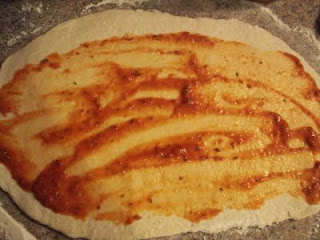

Spread some pizza sauce on it... I used spaghetti sauce, i had it on hand. :)


Lay out some ham
Sprinkle with cheese


Roll it up


And then cut! :)


Place on a foil covered pizza pan


another one i did was ham, mushroom and cheese...


And another that I LOVED was spinach and cheese! ;)


And then I did an all cheese one! :)


Here are all of them on the pan...


Here they are all done! They puffed up a bit and they were PERFECT!!! :) Super yummy if I do say so myself! :)
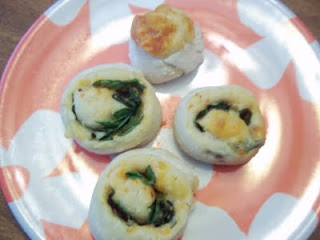


I ate most of the spinach ones, LOVED them!!! I think I will try and do spinach, mushroom, and cheese one! ;)


Pizza Wheels


2 2/3 cup all purpose flour ( I don't see why you couldn't use whole wheat too! ;)) You will need a little bit extra for rolling out


A dash of salt


1 1/2 teaspoons (heaping) active dry yeast


1 cup warm milk


2 tablespoons olive oil (I used coconut oil)


Spaghetti sauce, or your sauce of choice.. ;)


Ingredients to place inside your pizza wheels, like, ham, cheese, mushrooms (thinly sliced), onions, green pepper, diced small, baby spinach, etc... ;)


Preheat oven to 350 degrees.


Combine milk and yeast, stir just a bit. Let sit for 5 minutes, your yeast mixture should be a bit foamy by now. Add oil and stir.


Add flour, and salt and stir until just combined. This is where the fun starts, you get your hands into the mixture and knead until no longer sticky.


Divide your dough into 2 equal parts. Roll out into a 12x18 rectangle and spread your sauce over the top. Place your pizza toppings of choice on top and then top with cheese. Roll up and cut into 16 slices.


Place on foil covered cookie sheet and bake 25 minutes, or until golden brown and done.


We love pizza around here, and sometimes doing the same old same old gets a little old. Not that I fix it alot, but still, I like to keep things fun and easy around here! This is for sure a hit and will be making it again! :) ENJOY!!!!

Thursday, March 24, 2011

Basic Baked Beans

(I have no pictures for this post as well! :( I was going through my recipes and saw that I hadn't posted this one, and have NO clue where the pics are for this, but let me tell you, I DO KNOW for a FACT that I will be making this again! This would be GREAT with hamburgers or hot dogs for a cook out! Yummy! I'm thinking I am going to have to make this, and soon!!! :D)


I actually remembered to soak the beans last nite! :) Also, since I was up early, I went ahead and started cooking them. It took about 2 hours to cook and let me tell you, the house smelled sooooo good! I don't know what it is about beans cooking, but I just LOVE the smell! ;) Maybe it's because I remember my mom cooking them and when she did, she always cooked something good! Most likely a recipe that was my Aunt and Uncles, so it was G-O-O-D!!!!!!!! ;)

I served this with rice. It as really good! The kiddos all asked for more, so that's a plus in my book! :)

I really liked the fact that I could just put this in the oven and pretty much forget about it for 4 hours! I am pretty sure you could put this in the crockpot, but this was soo good in my cast iron pot just baking in the oven! Plus, it made the house smell really good too!

This recipe calls for navy beans, which I thought I had, but I couldn't find them. So I just soaked 2 pounds of pinto beans. I knew the recipe for the next nite would have pinto beans, so now, one step done for tomorrow's recipe! ;)

Basic Baked Beans

Soak overnite
1 pound navy beans and enough water to cover and then a bit extra. Your beans will swell up, so you want to make sure there is enough water. ;)

In the same liquid that you soaked the beans in, simmer for about 2 hours. Bring it to a boil and then turn way down to simmer for an hour and a half to 2 hours.
Drain, reserving the liquid.
Preheat oven to 275-300 degrees.
Combine in 2 quart casserole:
cooked beans
1/2 cup molasses
1/3 cup ketchup
1 teaspoon mustard
2 teaspoons salt
1/4 teaspoon pepper
1 onion, chopped
2 slices bacon, chopped, or 1/4 pound salt pork (optional)
reserved bean liquid to cover
Stir it all to combine.
Bake 4-8 hours adding liquid occasionally if necessary. Cover during first half of baking time, then uncover.

*I didn't have any bacon, so I didn't add any meat. I think it would be GREAT with some bacon flavor in this!
The recipe also calls for 1/4 cup ketchup, but I added a bit more.
And like I said at the top, I didn't have any navy beans, so I used pinto. Tasted just fine to me! ;)
Enjoy this super easy meal! It does take time, but really, the only time is waiting for the beans to soak and then to cook in the oven!

Friday, March 11, 2011

Roasted Chickpeas

These are really easy to make, and they are really good! I used some of the leftover chickpeas in my hummus. Yummy!!!

You can make these using canned chickpeas, or you could get the bag of dried chickpeas and then soak them over nite and cook until soft. You get WAY more from a bag of dried beans than you do if you bought a can. But if you need something fast, use the cans... ;) A bag of 1 pound beans cost me a buck, where a can of 14 oz beans cost me 99 cents. Ok, you are thinking, 1 cent cheaper, but you know what? You get about 3 times as much from the bag than you do the can! (does that make sense? ;)) I made 2 pounds of dried chickpeas and these guys puffed up like you would not believe! ;)


Mix together the spices and the liquids...


Stir in the chickpeas...


All covered in spices ready to bake!


Place in taco shell...


Add anything you want to it! ;) I added shredded cheddar cheese...


Some lettuce, I want to try spinach instead...


And some sour cream, notice how it got all over the place? Oh well, it's all good! ;)


My little one attempting to eat the taco!


He lost pretty much all of his chickpeas! Guess where they ended up?


Yeppers, the floor!!! He got about 5 in his mouth and rest where on the floor and under his chair!! But he really liked what he tasted! hahaha


Roasted Chickpeas

•2 1/2 t. chili powder
•1/2 t. garlic powder
•1/4 t. onion powder
•1/4 t. dried oregano
•2 t. ground cumin
•1 t. sea salt
•1 T. lime juice
•2 T. water
•One 14 oz. can of chickpeas, drained and rinsed
•8 taco shells
•Taco trimmings: shredded lettuce or cabbage, tomato, guacamole, sour cream, and shredded cheese, etc...

Preheat oven to 375 degrees. In a large bowl, combine chili powder, garlic powder, onion powder, oregano, cumin, salt, lime juice and water.
Add chickpeas and marinate for at least 30 minutes. (I like to do it for an hour!)
Place chickpeas on a baking sheet that has been sprayed with cooking spray.
Bake for 20-30 minutes, stirring once during cooking, until chickpeas are slightly crispy.
Prepare taco shells according to package directions. Fill with chickpeas and desired toppings.