Showing posts with label easy. Show all posts

Tuesday, February 5, 2013

Oatmeal Chia Pudding

Wow!! This is really good!!! I dislike oatmeal, with a passion, I've said that before, I know. ;) But this, this is really yummy and super bummed I only got ONE bite!!! :/ I mixed this up last night for the kids and was just hoping they would like it, not knowing how it would turn out. But knew they like cold oatmeal so this isn't that different, just added some chia seeds to make it kinda it thick!

Chia pudding is pretty good by itself, but these added ingredients just make it that much better! :D Let me know if you try it, add anything and how you like it! :)

I mixed this up in the Pampered Chef batter bowl...


Oatmeal Chia Pudding

2 cups oats (not instant)
6-8 tablespoons chia seeds (my measurements were used by a soup spoon which is a tablespoon ;))
3 soup laddles of homemade yogurt (or 3 small containers of vanilla yogurt)
Vanilla almond milk (I used Aldis brand)

Put all ingredients in bowl except for milk and stir to combine... I didn't measure the milk but I added it up to the 6 cup line. (I have half a gallon container and I used half of it!)
Stir to combine, cover and place in frig overnight!
Serve with fresh fruit or frozen berries...


You could totally added some cinnamon, cocoa powder (make sure to add pure maple syrup or honey to sweeten it a bit), chocolate chips...

You can really add anything and everything to this! The kids literally gobbled this down and they all were asking for more after they had seconds!! :) will make a bigger batch next time!! I really want to make it again tomorrow but we have to be out of the house by 6 am to head to Children's Hospital in DC to get 2 of my kids hearing aides checked... Maybe Thursday...? ;)

(I cooked each kid an egg to go with...)

Let me know what you think and how you like it! Let me know if you added anything! :)
I didn't add any sugar to this! :)


Thursday, August 2, 2012

Vegan CHEEZZEE Sauce

I have this REALLY awesome friend who is letting me borrow a REALLY COOL cookbook!  She is vegan and we've talked a bit...   She sent me a message asking if I would like to look at it and I was like uh yeah!  :)  I LOOOOVE this book!

Its called Vegan, on the Cheap by Robin Robertson

I'm not sold on soy, infact, we don't do any soy products, just b/c of everything with Skylar.  She wasn't able to eat or drink any milk products, so being the mom that I was, didn't do much research, and went ahead and did what my doc told me to do...  Give her soy...  Gave me all kinds of papers how it was safe and no cause of estrogen, etc...  Well...  After a year of reading and research, I switched to Rice milk and took soy out completely!  Now, to each his own and decisions...  This is my decision and if you are ok with soy, then that's fine.  I'm not judging, just my personal preference.  After doing some different reading on the topic, and talking to friends on both sides of the fence on this topic, this is what I decided.  :)  Seriously, not judging anyone!  :) 

So...  I wanted to make this the other night but didn't have any nutritional yeast, which I did have some and it was all gone!  :(  So the kids and I made a trip to Whole Foods and got some, along with some different rice and black quinoa!  :)

I'm not goona lie, the night I wanted to make it, I was PUMPED and ready to try it...  The next night, not so much...  I was thinking, this is going to be disgusting, I can't do it.  Even though all 4 of my kids were WOLFING it down like nobodies business!  Then my oldest said, hey mom, this cheese tastes different..  I said oh yeah?  Well, ok guys, it's isn't the "REAL" cheese you are used too..  This is a more healthy cheese, it's safe for people who can't have milk stuff to eat this.  But it is good right?  So then I took bite and swallowed  and thought, wow, this is good!  Of course I made sure I added the EXACT amount of salt and garlic, I don't normally measure my ingredients, but that, I made sure it was exact!  ;)

I don't think I could eat it by the spoonful, but mixed with some homemade salsa, it would be REALLY good with chips...  or over top rice and beans...  ;)

I don't know if I will win my hubs with this, but in moderation I bet he will be ok with it and eat it with other stuff, like in tacos, etc.... ;)

Super easy to make...

I'm still learning on what is vegan and what's not, I think I am getting it confused with gluten, etc... ;)  I'm also to tired to remember much right now!  Been a CRAZY 3 weeks!  ;)

But I made this cheese, and then used our new volcano rice, and had already mix up mashed pinto beans with olives, onions, cumin, and salt together, then had spinach and the cheezzee.
So it was hard taco shell, volcano rice (which I am so buying more!!!  :)))  The kids LOVED it and plus its fun to say, I had volcano rice! ;)), then the bean mixture, spinach and cheezzee!  SOOO good!  The kids all ate 3 tacos, well, except my little one...  ;)

Ok, enough blabbering, here's the recipe....

Cheezzee Sauce


2/3 cup nutritional yeast
3 tablespoons cornstarch
1 1/4 teaspoons salt (I used my pink sea salt)
1/2 teaspoons garlic powder
2 cups plain unsweetened soy milk or water
1 tablespoon olive oil
2 teaspoons fresh lemon juice
2 teaspoons apple cider vinegar
1 teaspoon yellow mustard


In medium saucepan, combine the yeast, cornstarch, salt, and garlic powder.  Turn heat to medium and whisk in milk or water. Cook, sitrring until the sauce thickens.
Remove from heat and add, oil, vinegar, lemon juice and mustard. It's now ready to use. If not using right away, refrigerate sauce in a container with tight-fitting lid, where it will keep for several days.

*I didn't measure my cornstarch, so it was much thicker after it cooled!  Looked more like pudding!  haha!!  :)
I didn't have fresh lemon juice so I used my stuff from frig...
Also used my homemade apple cider vinegar...
And I used water...  I thought about getting hemp milk or almond, but wasn't sure how that would taste with the cheezzee...  I prob will get almond milk to try it next time!

I do have left overs and plan on using it today for lunch!  With some veggies I think!  :)  Maybe mix in some salsa to go with some pretzels or chips?  ;)  Or on top of a rice cake!
The possibilities are endless!  :)

I got my nutritional yeast for $8.99 a pound, but I only got 2 bucks worth, which was WAY more than the container sold for the same price!  Um, let me do the math here folks!  ;)
Let me know if you try it and how you like it, or what you eat it with!  :)
I also recommend the volcano rice!  ;)

Seriously though, get over the fact that it isn't real cheese, it really is good!  And if you never had ever tasted cheese, you will never know!  But really, I do like it!  :)  Again, prob not by itself...  but def will be eating those leftovers!  :)


Thursday, May 31, 2012

Mandy's Lazy Ratatouille


I was roasting some veggies for supper, and they are all what you would use for ratatouille. 

I wanted to add something to these roasted veggies, mainly for the kids.  They love veggies, but not a huge fan of eggplant.  I was trying to think of a way to make it yummy for them!

So, I created...  Mandy's Lazy Ratatouille!  :)

You roast the veggie at 400 degrees for about 20 minutes, until soft.  Then just add some spaghetti sauce over the top and then some cheese.  Place back in oven til cheese is melted!  See, SUPER easy! :)

I got all but the eggplant at Farmer's Market.  I haven't seen eggplant quite yet there, I expect it to show up soon!  :)

This is what I cut up, I just sliced it up, not too thick or thin.  But it really depends on you, how thick or thin you want it!  :)

1 green zucchini
1 yellow squash/zucchini
1 medium sized eggplant
4-5 green onions
1 box mushrooms (I had gotten baby bellas at FM, it's about the same size as you would get in store)

Placed in a 9x13 pan and pour some garlic infused olive oil over the top, stirred it a bit, then place in oven at 400 degrees for 20-30 minutes.

Again, it's up to you how "crunchy" you want your veggies for this!  And how thick or thin you cut them!

Once they were done, I stirred it again, and just poured some spaghetti sauce over the top and grated some cheese for the top.  Place back in oven for 5 minutes, or until cheese is melted.

Serve!

I roasted some green beans and poured some Italian dressing over the top.  That was our supper.  It was enough to feed me and the kids since hubs was away for the night.  If I were to make this again, I would probably add one more green zucchini...

Try it!  Let me know how you like it!
Or if you do anything different!  :)
ENJOY!!!!

Friday, April 20, 2012

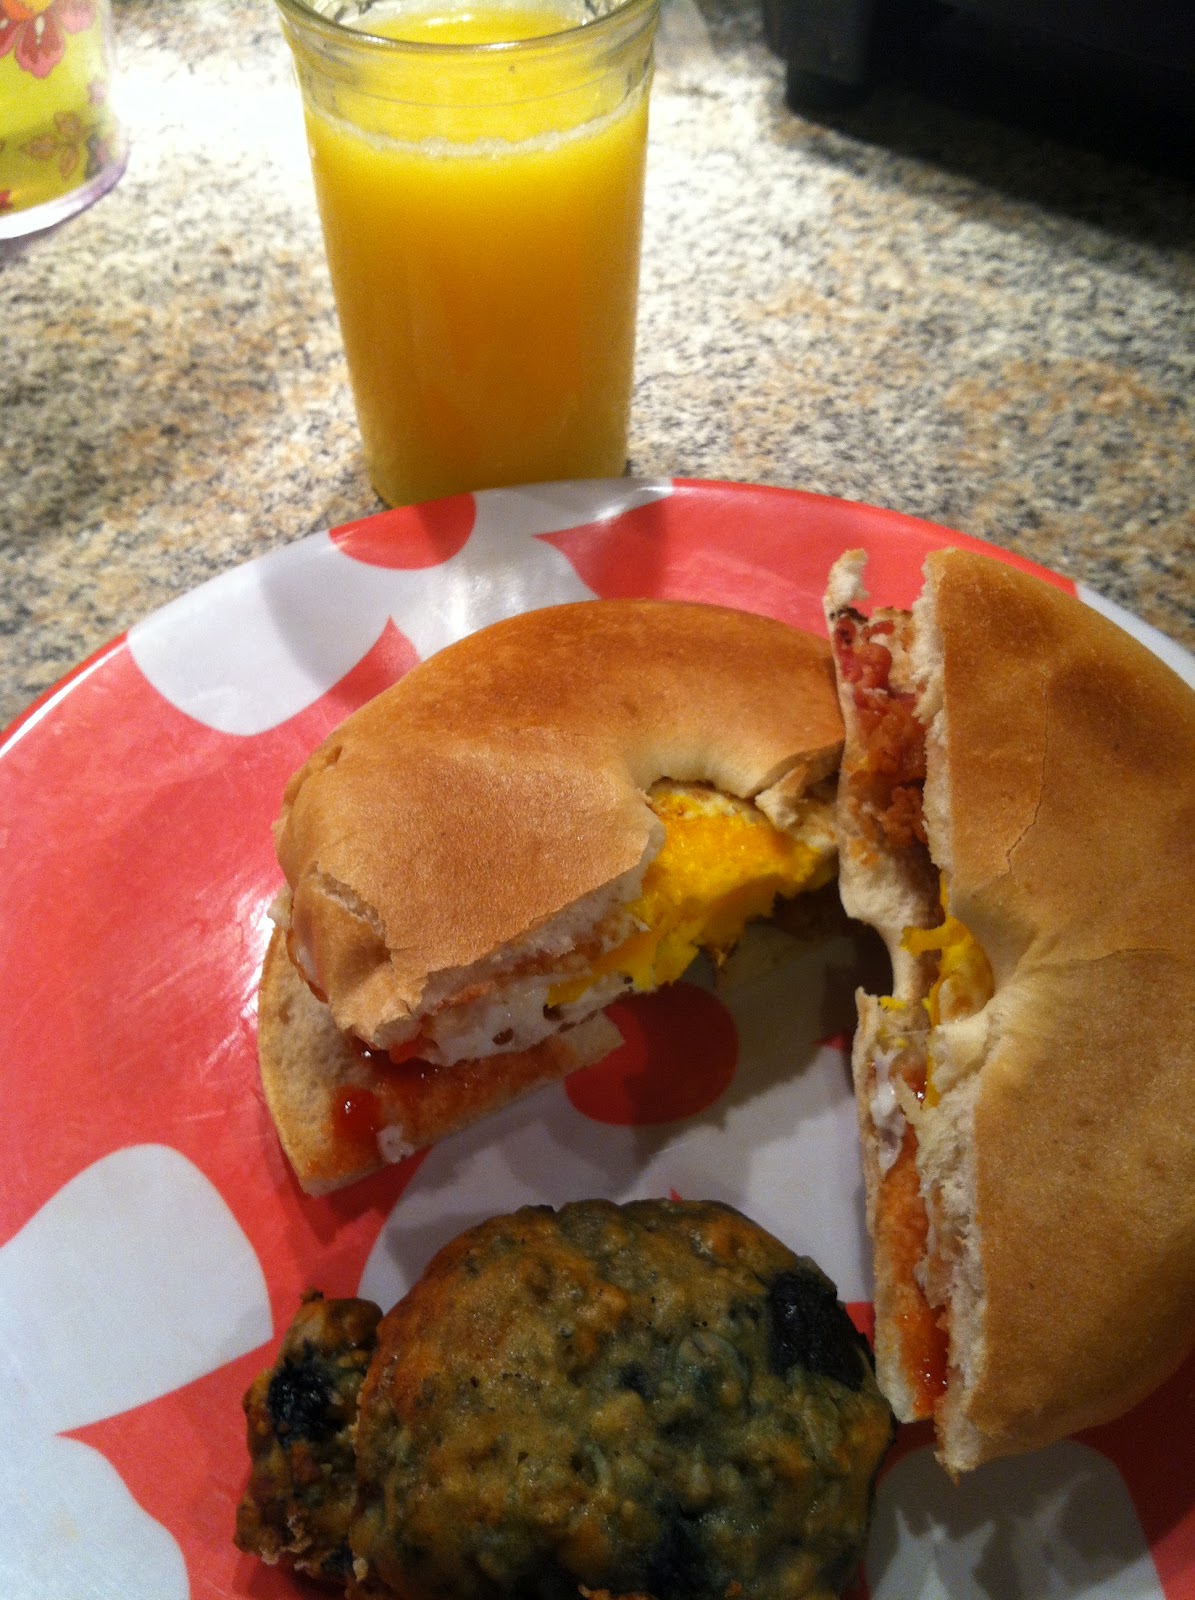
Egg and Bacon Bagel Sandwiches

Yummy!!!  :)

I had a friend who was moving and so I was supposed to raid their freezer and they had these small skinny bagels...  I knew immediately what I was going to fix with them!  THIS!!  :)

I had leftover blueberry breakfast cookies and fixed these yummy breakfast sandwiches to go with it!  :)

I fried up some bacon and then fried up some eggs in the bacon grease...  yummy...

I just put the egg in the skillet and then took a fork to scramble it a bit, but not too much.  Fried it til it was done, and put it on the bagel that had ketchup on both side!  ;)

Pretty easy!

Toast bagel
Put ketchup on bagel
Fry bacon
Put bacon slices on bagel
Fry egg
Put egg on bagel on top of bacon
EAT!

I'm thinking you can use avocado instead of ketchup...  MMMmmm...

You could make these the night before and wrap in saran wrap and then pop in microwave to heat really fast if you are in a hurry in the morning!

Keep it wrapped in saran wrap and you can even eat it in the car! :)

Enjoy!!!

Thursday, April 19, 2012

Black Bean Tortilla Pizza

I made this for lunch, and it was YUMMY!!!  I wanted to add some frozen corn to it and totally forgot, next time!  ;)

This was SUPER easy!!

I took a can of black beans, drained and rinsed them off, threw them in my small Pampered Chef batter bowl...  I then added one tomato, half a green pepper, 2 minced garlic cloves, and then sprinkled on some lemon juice, and a little bit of our favorite hot sauce.  Since it was mainly for the kids, I didn't add too much hot sauce.  ;)

I didn't measure the lemon juice either, but it was just a tiny bit...

I mixed it all up and put on a tortilla and threw in oven at 350 degrees for no more than 15 minutes!  It made the tortilla nice and crispy!

Like I said, I wanted to add corn, and I think jalapeno pepper and onions would be a good mix to add to it as well!

Oh, I shredded some Monterrey jack cheese on top too...  not a ton, just enough to give off a bit of flavor.

The kids wolfed it down and I must admit, it was pretty yummy!

So give it a try, super easy, could work for supper or lunch!  just add a few things to make it more filling for supper, or make sure you make enough!  I only made enough for one for each of my kids...  next time I'll make sure to make 2 for each!!!  :)  Easy and cheap, what more do you want?  ;)  Oh, and tasty!  :)

A Different Kind of Recipe

I haven't posted any recipes quite like this, other than laundry soap, but really want to share this...  It WORKS!!!  :)  Here's what I posted it my other blog, I just copied and pasted it!  ;)
--------------------------------------------------------------------------------------------------------

I've been searching ways to make things, or make things cheaper. NOTHING against people who coupon, but I just don't have time for that. I don't have time to search papers, and cut coupons and go to 5 different stores to get that deal. But if it works for you, AWESOME!! Just with 4 kids and 2 more coming, I need basically one stop shopping... So, I've been shopping at Aldis! LOVE that place! Been buying most everything from them... And so far, I've been spending an average of $80-100 a week in groceries, which is WAY better than the normal $150-200 I was before.

We got rid of our BJ's membership, we just didn't get much there. I don't need diapers anymore, and that was a MAJOR reason we would go there... Plus some bulk things, but I actually found that Aldis is cheaper and tastes WAY better than those items I used to get at BJ's, so really it's a win win situation!

Plus, I do a monthly menu, which can be a pain at times because I try soooo hard not to do the same thing over and over... But lunches can be a pain... I dislike buying "poison" meat and pb and j, well, let's face it, can't do that EVERYDAY, can you? I don't want my kids growing up hating it! :)

I also have to think of cold things for Curt to take for the days he is gone so he doesn't have to heat it up... And I know he's sick of pb and j and cold ham sandwiches! :)

So I drank the kool-aid, I've been making my own dishwasher soap for dishwasher, AND I've been making my own laundry soap! It's saved me SOOOOO much it's unbelievable! PLUS with shopping at Aldis for pretty much everything, it's awesome!!!

I saw a recipe to make your own deodorant... I was like, there is NO way I'm making my own deodorant... But the more I think about how much I spend on it, and what exactly is in there... I've been so careful about the food and things we eat, why shouldn't I watch what I put on my skin, I mean, let's face it, it does seep in, right? So really, it still gets in me... So yes... i thought, ok, I can make it SUPER cheap because I have all the ingredients, and if it doesn't work, it doesn't work, right?

It works!!! :) Not to gross anyone out, but people say girl perspire, me, no, I sweat. Let's face it, my dad cursed, no, he blessed me with so many things, and sweating like a pig in the SHADE is one of them! :) So I really was a little hesitate to use/try this, just because I buy the $11 stuff, and it's a SUPER small bottle!! No fair.. Anywho..

Yes, 3 simple ingredients, I made 2 bottles for uh lets say 3 bucks? So, yeah, I'd say its worth it!

I tested it by walking 7 miles in DC the other day and I didn't smell! ;) So that's a plus, right?

I've been using it for about a month now, maybe 3 weeks and have had no break outs and like I said, I don't stink at the end of the day, so it's a win win! :)

Here's how I made it! Let me know if you try it and how you like it! I want to make Curt a bottle of it and will add tree tea oil to his... He still has some store bought stuff, so will save those bottles and then fill em up! :)

I "think" I used about 1/3 cup coconut oil.. I really didn't measure.. I know, bad me! But really, what do you expect from me??? :)

I DID measure the cornstarch and baking soda, I used 1/4 cup... But then it was still really liquidy (is that a word?) and so I added a few more spoonfuls of baking soda and cornstarch (equal amounts of both) til i had a more solid consistency.. I then added about 6 drops of 100% pure essential lavender oil.

You can also use tree tea oil.

I then made sure my empty containers were clean and I then dumped in my homemade stuff. I set it in the frig to set up. ;)

It was SUPER hot in my bathroom a few days ago and it just melted a bit, so... In the summer if your bathroom or house is HOT, you are gonna wanna keep it in frig or someplace thats cool....

So there ya go... Super easy and CHEAP!!!! Really, it's easy and it WORKS! Plus, you know all the ingredients that you are putting in it, so it's safe! Another plus! :)

Let me know if you try it and how you like it... Come on, drink the kool aid with me, it really isn't so bad... Plus it didn't take that long to make! :)

Oh, one more plus, it doesn't stain your clothes!!! :D

Tuesday, January 10, 2012

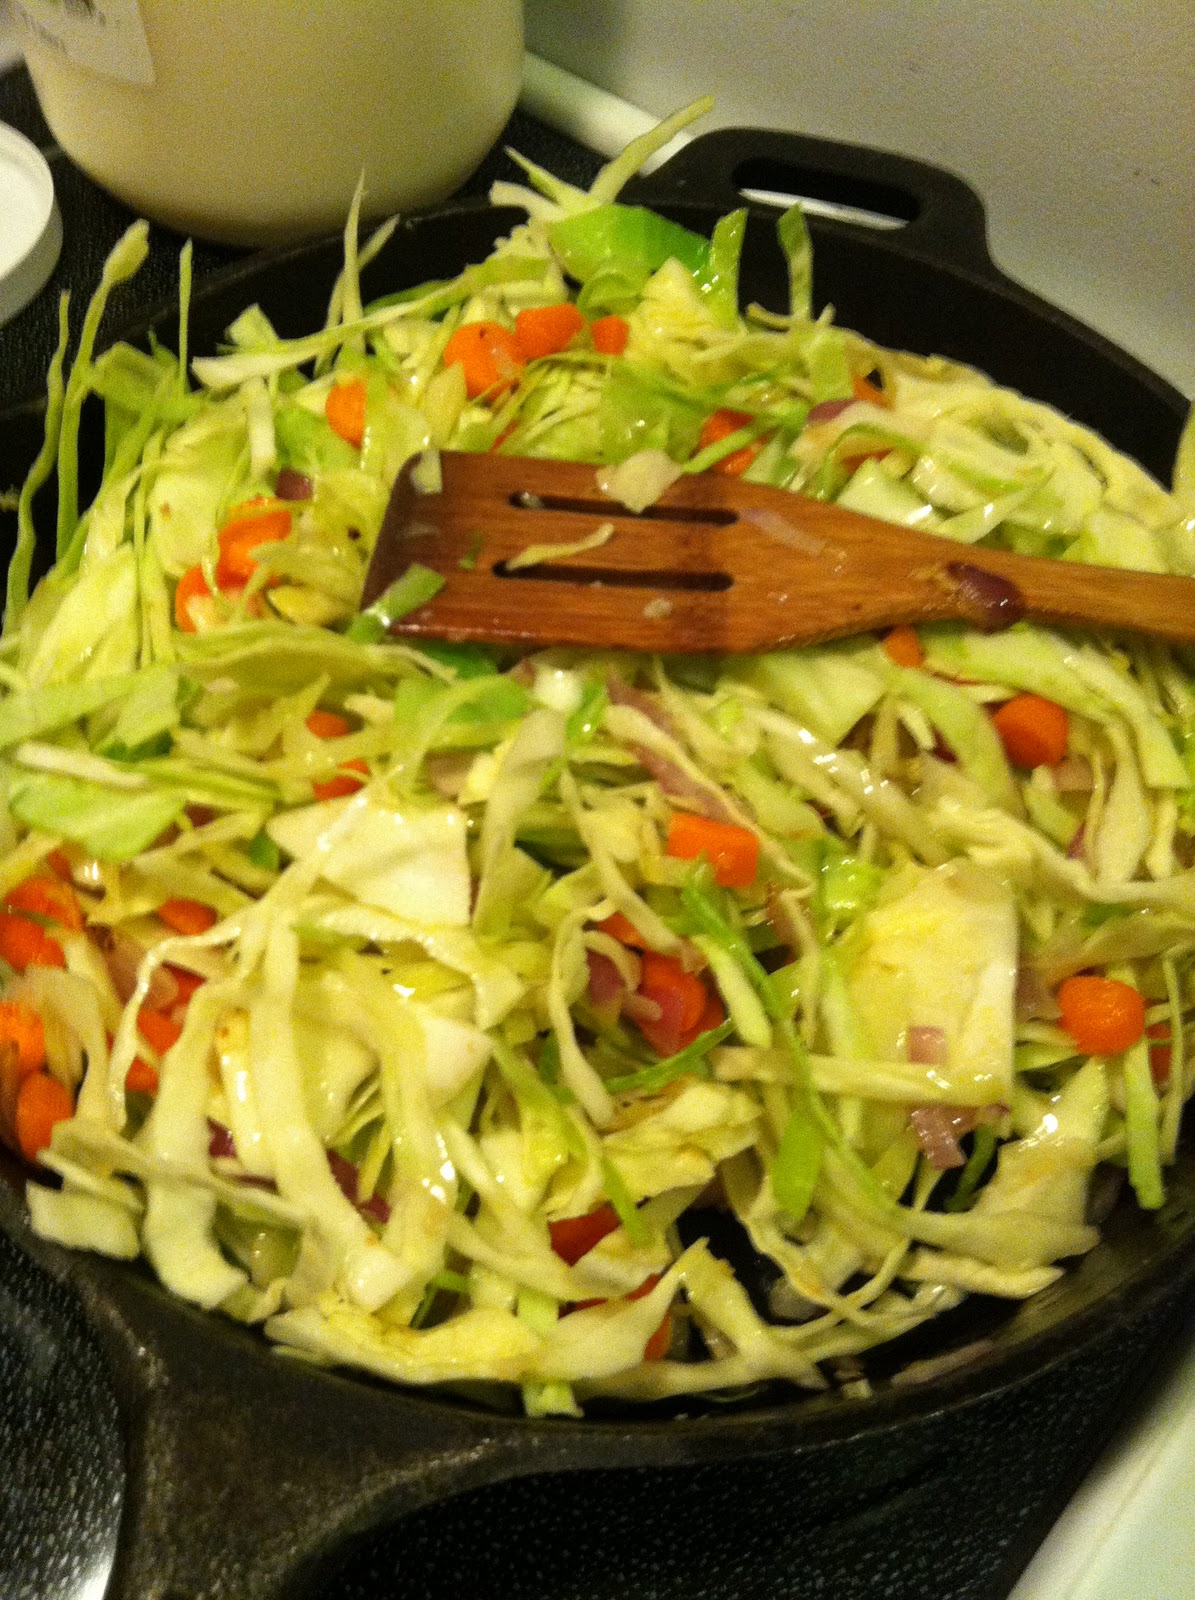
Cabbage and Rice

 Saute the onion and garlic for about 5 minutes...
 Then add the shredded cabbage and sliced carrots....
 Cook til desired doneness...
 Yummy!  I made a sauce to pour over the top...
 Serve on top of rice...  :)


I tried for the whole month of December to do no meat and no milk products for any meals.  I wanted to see how I felt and how the kids were acting by not giving them the meat and milk products.  Ok, they got milk in the morning, but I stayed away completely!  I am pretty proud of myself too!

We don't normally eat a lot of meat anyways, so it wasn't a huge deal, but wanted to omit it completely! 

Yea, December what not the greatest month to do that "diet"!  haha!!  So I am trying to continue that for this month!  :)

This is really easy and very few ingredients, which makes it cheap, but tasty!  :)


Cabbage and Rice

Heat 2 TBSP coconut oil in skillet...  add chopped onions and garlic, stir and cook about 5 minutes.

Add 4 cups finely sliced cabbage and 1/2 cup chopped or sliced carrots.

Stir fry for about 5 minutes or until veggies are your desired doneness.

Add:
1/8 tsp paprika
1 tsp salt
dash of pepper
2 t soy sauce
Stir thoroughly until well blended and pour over the cabbage. 
Serve immediately over rice.

Enjoy!  :)

Granola Apple Slices


I like to do snack lunches for my kids.  It's easy, healthy and fast.  :)  I am not sure about you, but I like quick, easy and healthy, and if you can do all three at the same time, SCORE!  :)

Most days I don't eat lunch, so if it's a snack lunch, I'll munch on things as I make it for the kids.  The kids also like to help make their lunches!

I had made some granola this morning, then just put some natural peanut butter on some apple slices, then dipped the apple in the granola!  The kids LOVED this!  A different way to eat an apple and granola!

As you can see, I just added some fruit and the rest of the apple plus some leftover chicken. 

Easy Peasy!  :)

Sunday, November 27, 2011

Cheesy Cauliflower Pancakes

I know what you are thinking...  Seriously, CAULIFLOWER PANCAKES???  Really, have I gone in the deep end or what?

Well, I was looking through pinterest and saw this recipe and thought, oh, I've GOT to try these!  Then I had a friend tell me she made them and they were absolutely delish!

So I was like yeah, I can TOTALLY make these, no one will know it's cauliflower, the cheese will cover it all up....

I almost fooled them, not that I want too, because like I've said before, I WANT my kids to be EXCITED and to know EXACTLY what they are eating!  I FULLY believe in telling them what they are eating, so one they know, and two, they can continue those healthy eating habits as teenagers and adults...  Or so I can hope, right?  ;)

I guess I'm also trying to "trick" my husband and see if he can taste it!  He ALWAYS finds out what's in them because the kids either tell him or I will after he's taken the first bite or two!  ;)

I did have them ALL on the cookie dough one though!  That was pretty awesome, not gonna lie...  I think I still need to post that recipe too...  Hmm...  I'm behind...

Ok, back to the recipe...  I'm tired..  I prob should've post things when I'm this tired!  ;)

Give them a try, they seriously are good!  REALLY easy to make too!  Gonna make these yummy pancakes again!!  :D
(I thought I had pics of it getting mixed up, but I didn't... or I can't find them, so here are the last few...  you get the idea though, REALLY easy!)


Here they are on the griddle cooking on one side...
Nice and brown, flip them puppies over!  ;)
Here they are all done, nice and brown ;)

Hee hee, it looks like 2 eyeballs with the bacon making it look like a frown face!  Should've turned it around a bit!  ;) Anyways...  Here they are done!  My kids gobbled up the pancakes AND the bacon! It was a very easy meal and it was good and healthy!  Can't go wrong can you?
For the bacon, I put it in a Pampered Chef Bar Pan (It has to have sides) and put it in the oven at 375.  It took about 15 minutes, but it was so much easier than frying it!  I put a piece of foil on top of the stone so as soon as it was cool, I just lifted the foil up and right in the trash!  Talk about EASY clean up!  Try it!  ;)


Cheesy Cauliflower Pancakes


1 head cauliflower
2 large eggs
1/2 c cheddar cheese, grated
1/2 c panko
1/2 t cayenne pepper (more of less to taste)
salt
olive oil

Cut cauliflower into florets; cook in boiling water until tender about 10 minutes. Drain. Mash the cauliflower while still warm. Stir cheese, eggs, panko, cayenne & salt to taste.

Coat the bottom of a griddle or skillet with olive oil over medium-high heat. Form the cauliflower mixture into patties about 3 inches across. Cook until golden brown & set, about 3 minutes per side. Keep each batch warm in the oven while you cook the rest.

*I served this with a bit of sour cream on the top.  I know, it sounds weird, but it was actually really good!  I think next time I make this, i will put this in my Vita Mix and really blend it.  ;)

These aren't that bad!  The hubs said I could make them again!  ;)


Wednesday, November 23, 2011

Turkey Wrap with Cucumber

REALLY easy lunch!!! I had some leftover cream cheese spread from Panera. I had asked for one little container of cream cheese, and they gave me this big huge whooping container. I said, I didn't order this, but they said, take it... I'm not sure if they had pity on me when they saw my 4 kiddos or not...? Or if they were really just being nice! ;) I just smiled and said thank you, and walked away with my big huge whooping container of cream cheese, 5 bagels and 4 kids! ;)

Now that I am getting back to the recipe... I know, you really wanted that little story! ;) I used my left over cream cheese, then cut up half a cucumber, stir that up, spread it on a tortilla, (you can use any kind you want, I used white, it's what I had... ;)), then slap a piece of turkey or ham or whatever floats your boat, then roll it up, cut it in half, serve with veggie or fruit and EAT!

I'm thinking pretty much any type of meat you want would work for this. I don't normally buy or have lunch meat on hand, but the kids love Lunchables...

I don't buy lunchables... A few reasons... There is NOT enough food in one to satisfy my kids... I would seriously prob have to get 3 of them to make them even somewhat satisfied... Two: I am not a big fan of processed lunch meat, but I do feed it to my kids, not all the time, but on occasion... Three: they are to stinkin' expensive!

So, we buy lunch meat, and I always have crackers and cheese on hand... so we make our own, and then I had all kinds of other healthy stuff to it, fruit, veggies, you name it...

So, that's why I have meat, In a nut shell, that's why I have lunch meat... ;)

This isn't the most healthiest meals, but there is some veggies in it, so take it for what it's worth! If you are looking for something different and fast and easy, then give this a try! :)


Cream cheese and cut up cucumber

Spread it out on a tortilla

Place a piece of turkey on top

Roll it up, cut in half and enjoy!


Turkey Wrap with Cucumber

4-6 oz cream cheese
half a cucumber, diced, and peeled
4-6 tortillas (I made 8 of these, so it just depends on much cream cheese filling you put in them and how much cream cheese you use...  ;))
turkey slices (one per tortilla)

Make sure the cream cheese is softened, then peel and dice the cucumbers and stir it in the cream cheese. Spread some cream cheese on a tortilla, then place a piece of meat on top.  Roll it up and cut in half and enjoy!
See, easy peasy!  Doesn't get much easier than that!  :)

Try it and let me know how you like it! :D

Friday, November 11, 2011

Powered Laundry Soap

Ok, I LOVE this one much better than the other soap that I posted!  ;)  It is just as easy as the liquid kind, but what I like about this, it doesn't clump!  I've been through 2 of the liquid recipes and decided I'm not 100% sold on it.  Yes, it got the clothes and towels clean, the clumping just didn't fly with me!

So I found something on pinterest, but I didn't follow it.  I kinda made it up!  I will make this again and will add a bit more lavender essential oils.  You could add any other oils that you would like.  Or you don't have to add any, but it just gives it that SUPER FAINT smell of clean lavender clothes!  ;)

I don't remember how much everything cost, but I got my baking soda from Aldi's, which only cost me 49 cents per box...  Yes, you read that right 49 cents.  I LOVE Aldis..  but that's another post...  ;)

I got the Borax from Target...  still not 100% sure what to believe with Borax...  And then the castile soap I got from Safeway.  A package of 3 bars was about 4 bucks I think?  So 4 plus 2 plus how much ever the borax was, I think it was 2.99?  It made me a gallon bucket FULL of soap... I am using about 3-4 heaping teaspoons of soap per load.  I haven't done towels, so I will probably have to do the 4 teaspoons for those.  I just washed my dish cloths, and they don't smell, so the soap is a winner in my book!  :)  Just want to see how it works with towels!

The kids can help grate the soap in the bucket, you mix it with your hands, they can also help break up the clumps of baking soda!  Really easy!

So lets say 8 bucks gets me a full gallon of soap...  I started it on the 10th of November, let's see how long it lasts me in this house!  We do alot of laundry around here!!!!  :D


Powered Laundry Soap


1 box Borax (76 oz)
3 bars of castile soap, grates
4 boxes of baking soda (16oz)
a few drops of essential oil IF you want, no need too.... (I used lavender because that's what I had on hand, just to see how it would work and smell)

Mix all ingredients in a bucket, stir with your hands to combine.  Place in a gallon container with a lid.  use anywhere from 2-4 heaping teaspoons of soap per load.

Also, I have a HE front load washer, I've used it 5 times already and no sign of extra soap suds escaping or messing up the washer!
The reason you need to use "special" HE soap in these washers is they don't need a super sudsy soap to wash the clothes.  Since castile soap is made from coconut oil, you don't get that extra bubbles like you would with most other soaps...  So, so far, it's working GREAT!

Also, remember to use white vinegar for your softener!  CHEAP and it works GREAT!  No, your clothes will NOT smell like vinegar, trust me!  I've been using it for about 4 months now!  :)

 Here it is with the grated soap and borax....
 Here it is all mixed up!  ;)  I should've added a few more drops of lavender oil, I think I added about 7, but may try to add a bit more next time...  ;)
Here's my gallon bucket, packed full!  It seriously was to the top!  I couldn't get my spoon in the container!!! 

I'll re-post the date when I'm finished with the soap, will see how long a gallon bucket of powered soap lasts in this house!  :)

*Since writing this on the 10th of November, I still LOVE it!!  It works GREAT!!!!!!  i don't smell the lavender smell, so I may still go in and add a bit more, but then again, I may not!  I use 3 heaping teaspoons (a plastic spoon) for towels and sheets and usually jeans, but only 2 heaping teaspoons for whites and darks.  Still no probs with the front load, it still is working great!  You may need to adjust the teaspoons to what works for your clothes, but loving this stuff so far!  It looks like it's going to last me longer than a month too!  :D
Try it and let me know how you like it!!!  ;)

Sunday, November 6, 2011

Pumpkin Oatmeal

This is really good!  I know, I think I start alot of my posts out like that, but it's the truth!  :)

It's PUMPKIN season, so of course it's good!  :)  I actually had some canned pumpkin from last year, so I used that.  Yes, it was still good!  ;)

I added pumpkin, raisins, walnuts and a pumpkin pie spice to this oatmeal!  My kids ALLLLL asked for seconds!!!!  :)  I also used steel cut oats, so it took a bit longer to cook, but you can EASILY use regular oats, or quick cooking oats...  ;)

Pumpkin Oatmeal

1 cup steel cut oats

2-3 cups water

Pumpkin puree

pumpkin pie spice

raisins

walnuts


Cut steel cut oats until they are done.  Mine took almost 25 minutes....  I then took a whole can of pumpkin, (the small can, not the HUGE can!  ;)) the pumpkin pie spice, raisins and walnuts, stir until combined and warm.  Serve nice and hot!  If you want it to be a bit sweeter, add some honey or pure maple syrup.  You could add brown sugar if you want.  But I try to serve it to my kids without the sweetener.  I also ate this with out any sweetener, and it was good!  The pumpkin wasn't too overwhelming either.  So if you aren't a HUGE pumpkin fan, you would like this!  :)


Bring your oats to a boil and then back down to a simmer, cover with a lid and simmer until done.
Here it is ready to add everything!  :)
Raisins, pumpkin puree, walnuts, and pumpkin pie spice
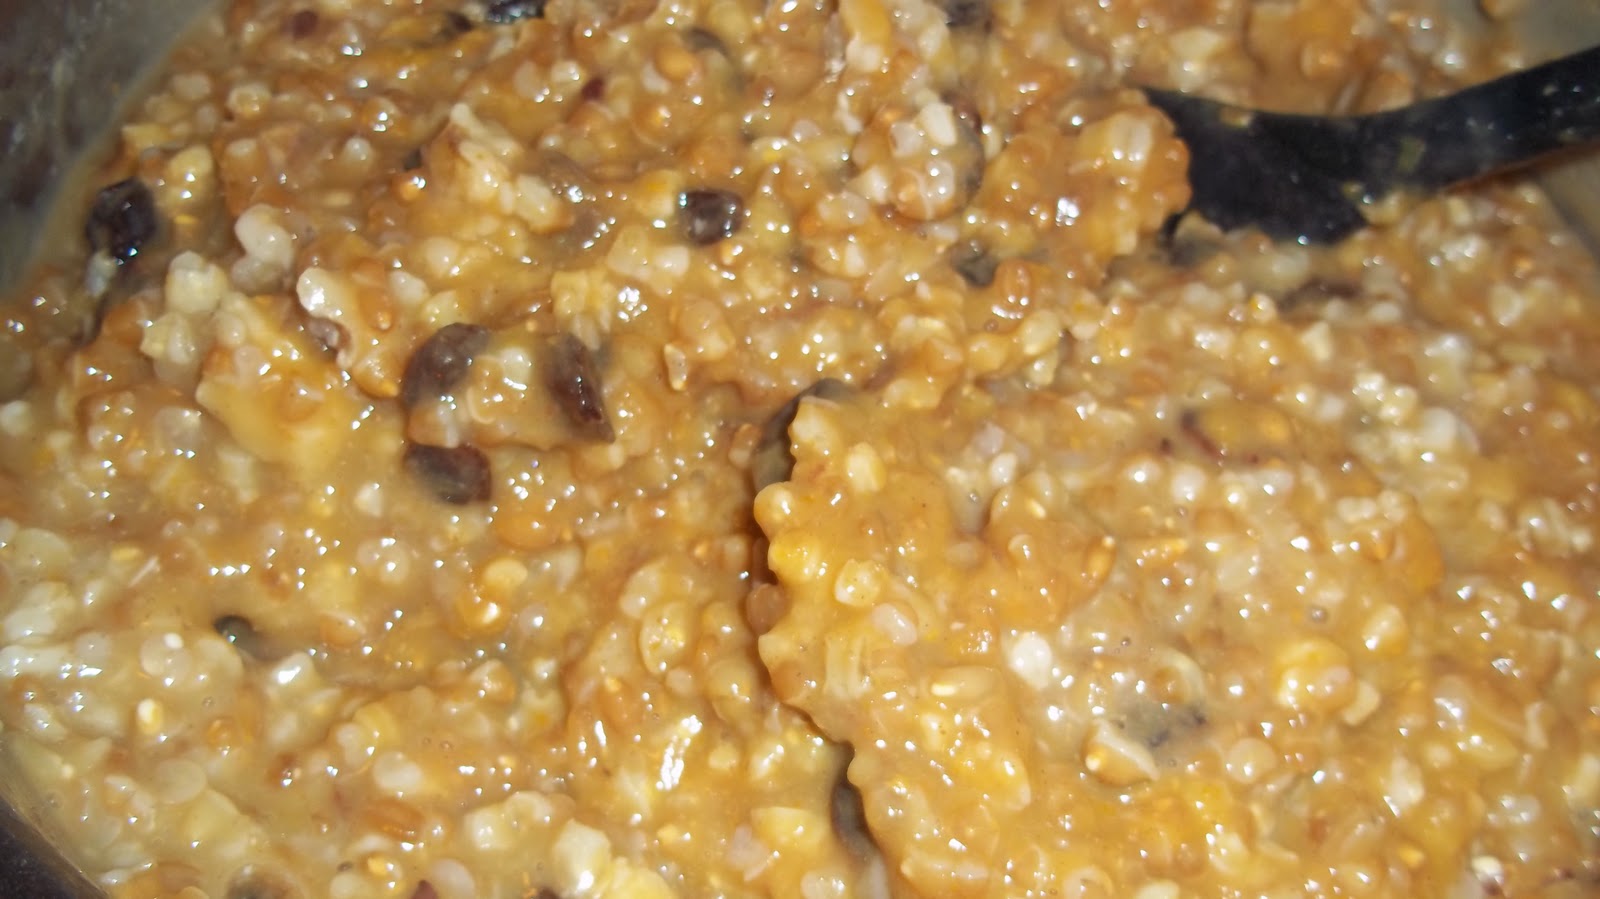
All done and ready to eat...  This may not be the best picture, but it REALLY is good!  :)

Saturday, November 5, 2011

Creamed Eggs

I got this recipe from one of my Amish Cookbooks...  When I first wrote it down on my calendar to make, I thought it would be really good, but then I was looking at the ingredients and how to make it, then I thought, oh no, the kids aren't going to eat this...  BUT, they DID!!!!  They all ate 2 slices of bread with the creamed eggs on top!
It was really good!  It was a nice filling breakfast on a cold morning! 


Creamed Eggs

6 hard boiled eggs
6 tablespoons butter (I used coconut oil)
6 tablespoons flour
1 1/2 teaspoons salt
Dash of pepper
3 cups milk
Bread, toasted

Melt the butter in a heavy saucepan, add the flour, salt and pepper.  Stir until well blended. Slowly add the milk stirring constantly.  Cook until smooth. Chop the hard-boiled eggs and stir them into the sauce.  Serve on hot toast.

(this was taken from The Amish Cook by Elizabeth Coblentz)


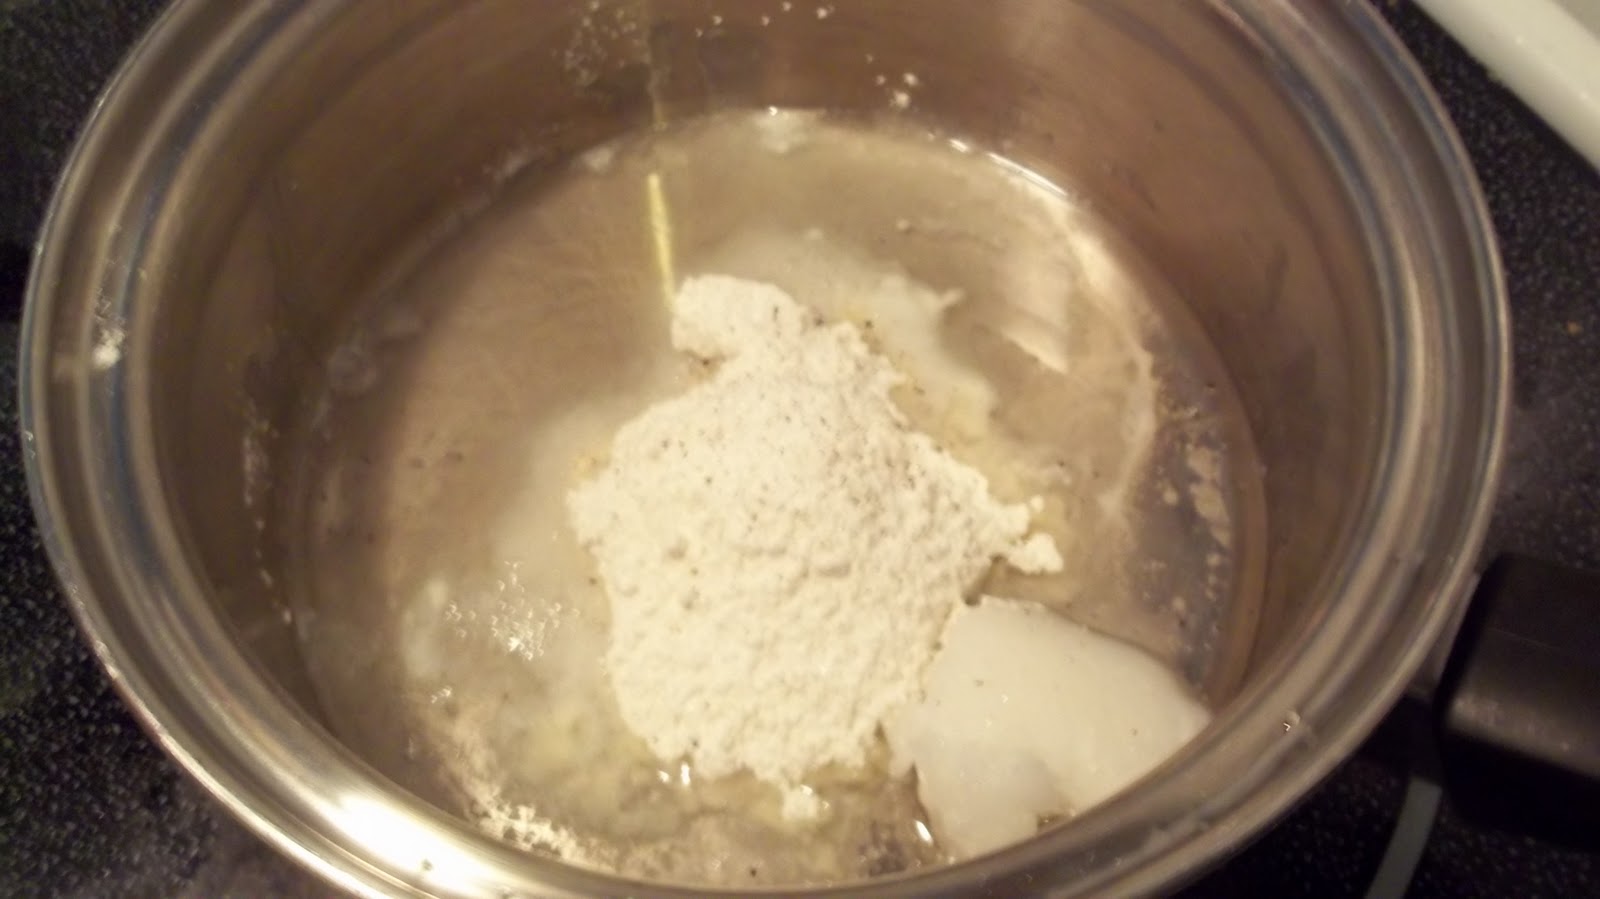
 Flour in the coconut oil
 Stir until smooth
 Add milk
 Add chopped eggs
 Dump all the eggs in
 Stir it all up
 Yah, you like my toast don't ya?  I got this toaster YEARS ago from my parents, one side has Winnie the Pooh and the other Tigger!  ;)  anyways, get your toast ready....
 Put a nice big spoonful or two of the creamed eggs on top of the toast
Cut up and enjoy!!!  :)

Friday, November 4, 2011

Quinoa Porridge

I honestly wasn't too sure about this.  I haven't been rinsing my quinoa like all the recipes say you are supposed too.  But this time I did, and I'm not gonna lie, I really did notice a difference!  So from here on out, I'll be taking the time to rinse those little tiny things!  ;)

I just took a coffee filter and placed it inside a strainer, then poured in how much qunioa I wanted in the strainer.   Then put it under the faucet to rinse it.  Pretty easy!  ;)

The kids really liked this!  My lil man didn't gobble it down like his older sisters and brother did, but he did eat some of it!  ;)  I ate a small bowl and liked it!

You could put anything in this porridge!  I used cinnamon, an apple and raisins and chopped walnuts.

This is actually pretty easy too!  The health benefits of quinoa are just awesome!  :)

Rinsed the qunioa, placed it in my water, brought it to a boil, then put the lid on and simmered it for 15 minutes.  The whole time I was in and out of the shower, perfect timing!  :)  Once the 15 minutes were up, I poured in the goodies, then about 1 cup of milk.  Let it simmer for a few more minutes, and viola, it's done!  :)  If you wanted it to be sweet, you could add a bit of pure maple syrup or honey.  i did not add any of that and I was able to eat it!  So that tells you something!  ;)

You could add fresh peaches, strawberries, blueberries, or you could do applesauce and cinnamon, really, anything goes!  ;)


Qunioa Porridge

1 cup rinsed quinoa
2 cups water
1 - 1 1/2 cups milk
and any "toppings" you want....  apples, cinnamon, chopped walnuts, raisins, cranberries, any other dried fruit or any other fresh fruit

Bring the qunioa and water to a boil, uncovered, once boiling, turn down heat to a simmer and simmer with the lid on for 15 minutes.  If the water hasn't absorbed completely, that's ok...  ;)  Add your toppings and milk and simmer until desired porridge consistency!

Yummy and easy!  You could make this the nite before and just heat up in the morning for a fast breakfast!
Let me know if you try it and what combo of toppings you use!  :)
 Quinoa before the boil...
 Quinoa after the boil and simmer for 15 minutes
 All toppings in the pot, I left the skin on the apples... not only is it pretty, but there is many health benefits to leaving the skin on!  ;)
 Toppings and milk added
 All stirred up, needs to simmer for a bit...
I probably shouldn't have let it cook as long, but with little kids fighting in the morning, I kinda had to let it cook a bit longer...  I could've added a bit more milk, but they were ready to eat!  ;)

Thursday, November 3, 2011

Whipped Maple Apple Dip

I found this on Pinterest!
Anyone else somewhat addicted to it (Pinterest)?  Well, I really can't be, I don't have a whole lot of spare time...  I usually just go through a few categories and hit like and repin if it's something I want to remember!  ;)  SOOOOOO many cool ideas on there!

Anyways, I did find this on there.  SOOOOO good!  The kids GOBBLED this down!  We had just gotten some fresh apples from the farm, so it was PERFECT to make this for their snack that nite!

REALLY easy too!  :)  REALLLLLY good on FRESH from the tree or farm apples!  :oP


Whipped Maple Apple Dip

1 cup heavy whipping cream
1-2 tablespoons pure maple syrup (none of that fake "pancake" syrup stuff!  ;))

Whip cream and  syrup together in a mixer with the whisk until it's whipped topping.  Serve with apples of graham crackers.
Super good and easy!!  :)

If there are any leftovers, you can store them in the frig for 1-2 days.
I had no leftovers, so no need to store any!  ;)


Try it and let me know how you like it!  SOOOO good and easy!!!  :D
My kids LOOOOOOVED it!!!  :D

Friday, October 14, 2011

Four Bean Chili

Wow!  This was so good!  The seasoning was PERFECT!  The only bad thing, I didn't measure exactly how much I put in!  I KNOW what I put in, just not the amounts!  It really is also up to the person how much of something you like, less spicy, more spicy... 

I soaked 4 different beans last nite.  I just put it all in one pot, then cooked it.  SUPER easy!  It also makes it WAY cheaper! I got all the other ingredients (canned tomato sauce, a can of diced tomatoes) and then the green pepper was from the Farmer's Market.  I think I figured the whole crock pot of soup cost me right about $5, and I have leftover to use for tomorrow nites supper!  If I made enough I may be able to do ONE more meal!  Are you kidding me?  Atleast TWO suppers for a family of 6, for $5!  How COOL is that? 

I didn't measure out the beans, I just kinda guessed about how much I would need.  (In the recipe, I gave you exact amounts for using cans of beans)  I took black, white, kidney and pinto beans.  Just dumped them in a pot and covered with water overnight. Brought them to a boil and then dropped down to a simmer for 2 hours.  While they were cooking, I cooked my onions in olive oil, and then added the garlic once the onions were almost caramelized.  Dump those in the crock pot with the tomato sauce, diced tomatoes and a can of tomato soup.  I added a can of tomato paste and added some cans of water. 

Once my beans were done, I added them to my crock pot.  Let it simmer on low for the rest of the day!  Boy did it smell GOOOOOD when we got home from SPEAR, that was at 3:!5, I still had to wait a little over 2 hours to eat supper!  :(

I then mixed up some homemade corn bread, which I already posted the recipe. 

What a yummy fall meal if I do say so myself!  And cheap to boot!  ;)  I like cheap AND good!  :)

Let me know if you try this, or if you have any questions!  :)

 Up close of this delicious soup!!!  :D

I couldn't wait to try the first bite, I'm not lying, the seasoning was absolutely PERFECT!!!  :)

This was my Gramma's bowl...  I used it ALL the time when I was at her house, she used it ALL the time too!  I remember one time we got into a little "fight" over who was going to use it!  haha!!  ;)


Here it is with the corn bread that I made!  :)  Very good filling meal!  BONUS, we have leftovers for tomorrow nites meal!  Can't wait!  Baked potatoes with this yummy chili on top, then sour cream and cheese, yummy!!!  ;oP


Four Bean Chili

1 Tbsp olive oil
1 Large Onion, chopped
3-4 Garlic Cloves, minced
1 Lb Lean Ground Beef
1-15 Oz Can White Beans, rinsed and drained
1-15 Oz Can Kidney Beans, rinsed and drained
1-15 Oz Can Pinto Beans, rinsed and drained
1-15 Oz Can Black Beans, rinsed and drained
1-28 Oz Can Chopped Tomatoes with Juice
2-15 Oz Cans Tomato Sauce
2 Tbsp Chili Powder
1 Tbsp Cumin
2 Tsp Salt


Saute the onion in the olive oil until it's just beginning to caramelize.  Then add the garlic, more or less to your taste!  ;)
Place everything in the crock pot and turn on low for 8 hours. 
Serve with corn bread.  Or you could add some sour cream, cheese, chives to this as well...  But since I am going to serve this on a baked potato, I'll use those toppings for that!  ;)