Tuesday, May 25, 2010

Strawberry Dream Cream


Since it's getting nicer and warmer outside, I figured I should be posting this! I am soo far behind... I am not gonna apologize this time... ;) Finally got the oldest DONE with her school work, now I can "hopefully" catch up on some blogging!

This was soooooooooo good and easy, and the cool thing is, you DON'T need an ice cream maker! That's right, you do NOT need one! :)

You don't have to make it this way all the time, you can play around with different flavors. I made chocolate with mini chocolate chips, super good! :)


Chopped up strawberries


Whipping cream ready to have all the other ingredients added


Ready to help! :) Adding the sugar


Another one that wants to help! He added the other half of the sugar


YUMMY!!! Ready to be frozen

Look at all those strawberries! YUMMY! :)


Out of the freezer after the 1st 3 hours... Ready to be whipped up!


Ready to go back to the freezer for the 2nd time!


I already ate a couple spoonfuls at this point... I mean, I just HAD to try it to make sure it was good! I could've just drank a cup of this! Who cares if it wasn't frozen hard! :D


All done and ready to be eaten! The kiddos LOVED this!!!! Okay, so we all did!!! :)


Strawberry Dream Cream

2 - 3 cups strawberries, chopped up nice and small, or you can mash them
2 cups whipping cream
1 can sweetened condensed milk
1 cup cold water
6 tablespoons sugar
1/2 teaspoon vanilla

Pour whipping cream in a chilled mixing bowl. Beat until soft peaks form.
Then add the sweetened condensed milk, cold water, sugar and vanilla. Mix it all up, then add the strawberries.
Beat again until mixed.
Pour mixture into a 9x13 pan. Freeze until mushy, about 3 to 4 hours. Remove from the freezer and put back into the mixing bowl, beat until smooth but not melted. Pour the mixture back into the container and freeze until ready, about 3 hours.
ENJOY!!!!!

*Make sure you chill your mixing bowl before adding the whipping cream. ;)
I used the tupperware 9x13 container that has the lid, works GREAT!
Try using other flavors, add chopped up oreo's, your favorite candy bar, chocolate chips... the possibilities are endless with this!
I made it chocolate and used about 1/2 to 3/4 cup chocolate powder, then added some mini chocolate chips I had. SOOOO good!!!
The one thing about using chopped strawberries instead of mushed, the strawberries are kinda hard, but it was good! :)

Tuesday, April 6, 2010

Dessert Tacos


Oh my! This was SUPER delish! Although when I slapped the hard shell tacos on the table, my oldest son was like, um, that's NOT gonna taste good mom! He knew I was making dessert, just didn't know what and saw those taco shells! :D

You could do this different ways as well. I used vanilla ice cream and strawberries, but you could use other fruits or different ice cream flavors. I wanted to put banana's in this, but mine were still a little too green to eat!


Take an empty shell


Put some ice cream in it!


Place the strawberries in the shell on top of the ice cream


Then add the whipped topping


Then add the caramel and chocolate ice cream topping!


YUMMY!!!!!!!!! :oP


You WILL get messy with this dessert, but it is TOTALLY worth it!!!!!


Dessert Tacos

6 hard shell tacos
Vanilla ice cream (slightly softened)
2 containers of sliced strawberries
Whipped topping
Caramel ice cream topping
Chocolate ice cream topping

Place some vanilla ice cream in the bottom half of the hard taco, then place the sliced strawberries on top of the ice cream. Put a spoonful of whipped topping on top and then drizzle the caramel and chocolate ice cream topping over the top.

*This is SUPER messy, but SUPER good! :D
I thought about spraying the shells with veggie oil, then sprinkle with cinnamon and sugar, then pop it in the oven for a few minutes.
You could even use the stand up shells, it might be easier getting the goodies in it!
I made whipping cream out of heavy whipping cream. I just added some sugar and vanilla to it. Make sure your bowl is COLD before whipping up your cream!
Like I said at the top, you can use WHATEVER flavors and fruits you want! So experiment and HAVE FUN!!!
Please post comments on how you fixed it!!!

Tuesday, March 30, 2010

Cranberry Chicken or Pork


This is SUPER easy to make and it is REALLY good! The kids gobbled it right up! I think next time I may get legs or thighs, bone in and try it on the grill! Or under the broiler, but with it getting oh so nice out, I'm gonna wanna grill more! :)


Whole cranberries, right from the can!


Poured the dressing right on top of the cranberries...


Stirring up the dressing and cranberries...


The sauce all mixed up ready to be dumped over the chicken!


I spread a bit of the sauce in the bottom of the pan so the chicken wouldn't stick.


I put in 5 boneless, skinless chicken thighs. You could use any kind of chicken for this recipe! You could even use pork chops!


Before placing it int he oven...


All done after I pulled it out of the oven!


This picture is a little dark, but it was really good!


This is what we had with the chicken, a yummy citrus salad! :) Recipe for that tomorrow!


Cranberry Chicken/Pork

Chicken or Pork (you will need as much as you need! Make sense? I used 5 boneless, skinless chicken thighs. You could use chicken breasts, or even pork chops! Just get as much as you would for your family!)
1 can (16oz) whole berry cranberry sauce
1 (8oz) bottle Catalina salad dressing

Mix the can of the cranberry sauce and the dressing together. Put your chicken or pork in a baking dish, and pour the dressing/cranberry mixture over the top of the meat of your choice! Cover with foil and cook for 45 minutes to an hour at 375 degrees.

*Like I said at the top, I want to try bone-in chicken pieces and grill them next time.
I also think that any type of pork chops would go GREAT with this combo of dressing and cranberries!
Enjoy and let me know what you think!!! :)

Monday, March 29, 2010

Chicken Rice Casserole


This is soooo much better when my mom made it! But I LOVE this! I just sometimes forget how long it takes, so by the time I am ready to get it all together, I realize that there isn't enough time for it cook! So, I usually say, oh well, next time, but this happens alot!

It is SUPER easy to make and it is oh soooo delicious!

It is made from ingredients that pretty much everyone always has on hand! Well, maybe not the chicken all the time! But like I've said before, I like to cook up all my chicken breasts and dice them and put them in little baggies. Then into the freezer for whenever I need cooked, cut up chicken! It works GREAT! May take a bit of work to cook it all and cut it, but it's worth it! :)


Place chicken in a pot


Add water to cover


Place slightly cool chicken on cutting board and cut up
(or if you have it cut up and frozen, make sure it is de-thawed)


Place 2 cans cream of chicken soup in bowl


Add broth or water


Whisk it all together


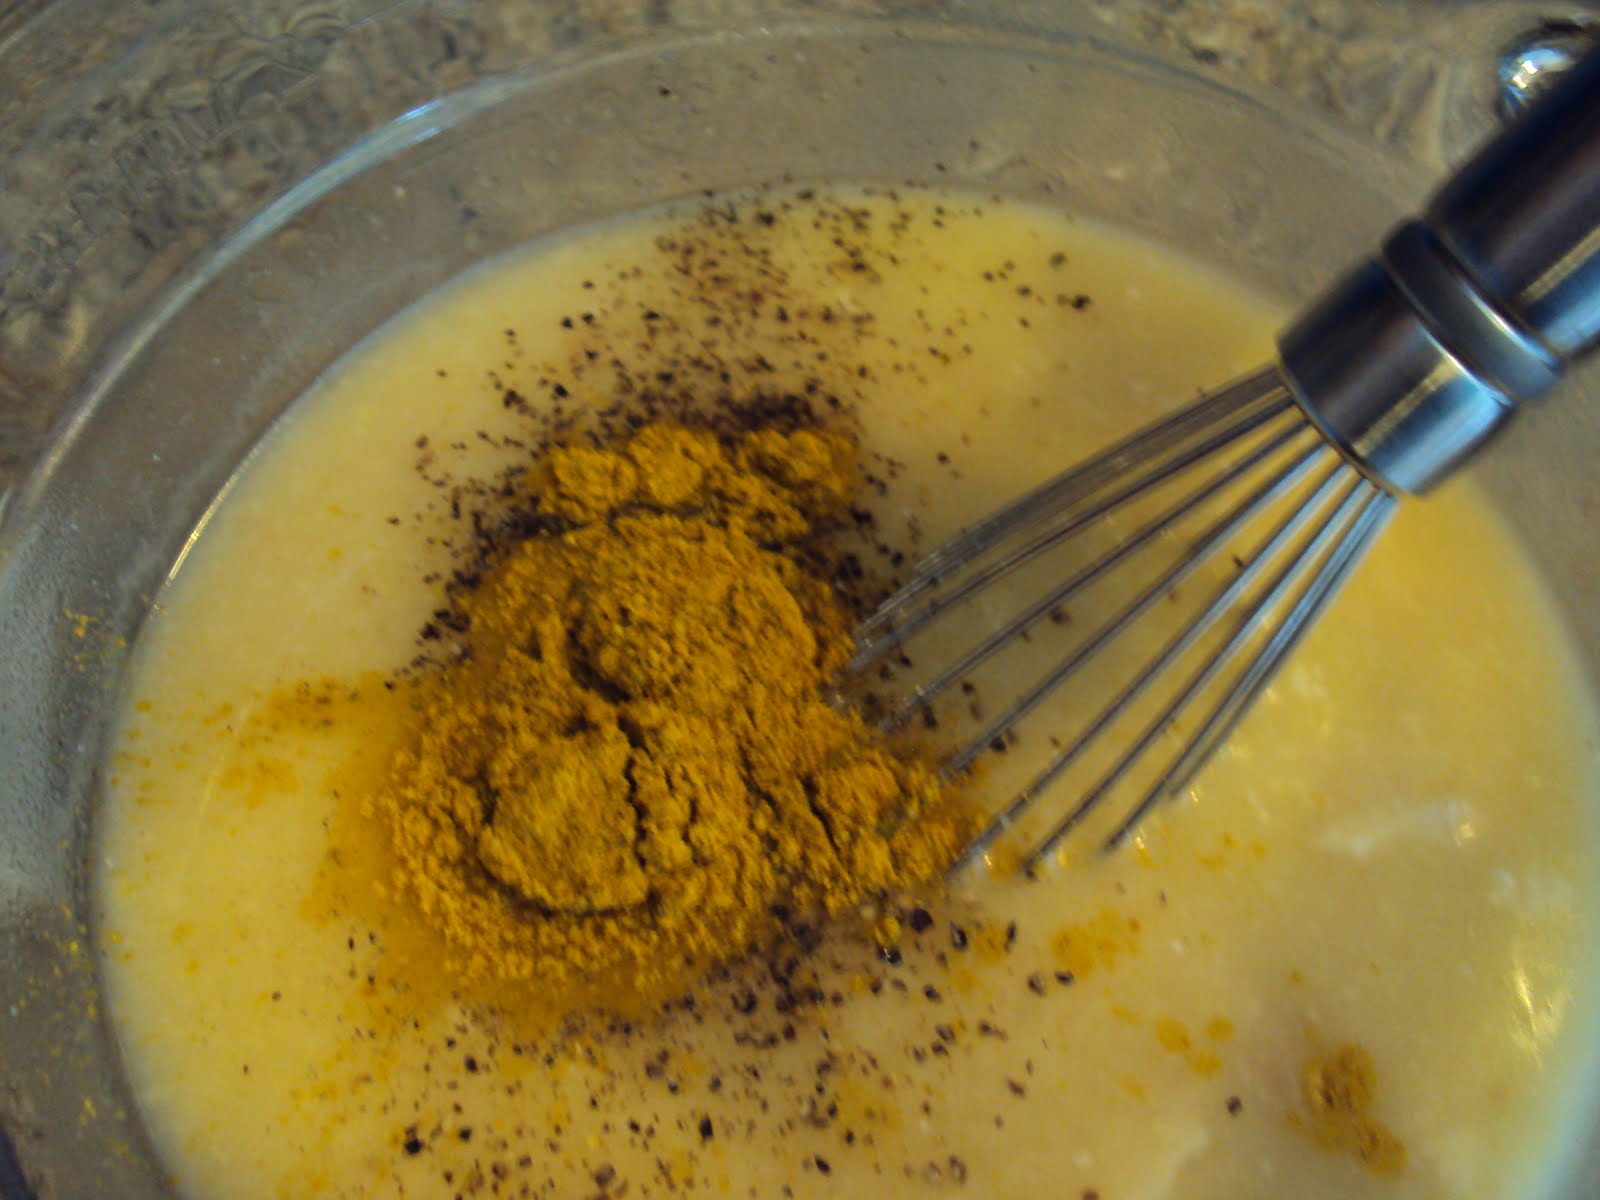
Add one HEAPING (as you can see) teaspoon of curry powder, salt and pepper


Whisk all together


All whisked up!


Add 1 cup rice


Add cut up cooked chicken and stir


All mixed up, ready to bake!


Greased 9x13 pan, all greased up...


In the pan....


Be sure to cover the pan with foil


What it looks like after an hour cooking...


All done, ready to eat! Make sure you stir it before serving!


Yummy!!! I like to serve this with a veggie and usually have bread and apple butter with it, but didn't have the bread part...


Chicken Rice Casserole

1/2 cup chopped onion (I just grab a medium size one and chop the whole thing, I don't measure!)
1/4 cup butter
1 cup finely chopped celery
2 cups cooked, cut up chicken
1 cup uncooked long grain-rice (not the minute kind either)
1 1/2 tsp salt
1/4 tsp pepper
1 tsp curry powder
2 cans cream of chicken soup
2 cans chicken broth (or water if you don't have the broth, which I don't most of the time, so I use water!)

Preheat oven to 350 degrees.
Saute the onions in the butter, but do not brown them!
Mix, celery, chicken, rice, salt, pepper, curry powder, chicken soup, and broth all together. Place in a greased 9 x 13 pan. Cover and bake for 2 hours. Check after the first hour and stir. Keep checking every 20 minutes until done. It may not take the full 2 hours, but sometimes it does!

*Like it shows in the pictures above, I usually mix the soups and water or broth using whisk first, then add spices, mix again. Then add the chicken and rice.
I don't always have celery, so I may do one can cream of chicken and one can cream of celery. Or just 2 cans cream of chicken and no celery! :)
I don't always saute the onions either.
I don't measure the salt and pepper, I just put some in!
Also, I use a heaping teaspoon of curry powder!
You can double this recipe and put the other half in the freezer for future use. You will just want to mix up a can of cream of chicken and half a can of water and re-bake it. Make sure it is completely thawed before doing this though.

Mom, hope you don't mind I posted this, I forgot to ask before posting! :) LOVE YOU

Saturday, March 27, 2010

Chicken!!!

So here's a tip, since I really haven't posted any yet! I am not doing as good of a job as I would like too, but my dear, sweet, adorable children have not really let me be in the computer for long periods of time! By the time they are asleep, I am ready to go to bed myself, or am doing all the things that didn't get done during the day!

But that's ok! Atleast I am getting SOME things on here! :)

Has anyone tried any of the recipes? Post comments, or let me know! I really would love the feed back!!! Good or bad, I can take it! :)

Okay, so chicken. I usually buy the big pack at BJ's of boneless, skinless chicken breasts.

They are nice there because they are "freezer-ready". BUT I don't usually just cook a whole chicken breast.

So I will put all the chicken in a big pot, cover with water, and bring to a boil. Some people bring the water to a boil first, then add the chicken, but I usually put to much water in, then it overflows and boils over. Not usually a pretty site!

So once your chicken has come to a boil, keep it boiling for 30-45 minutes. I turn my chicken every now and then, just to make sure it isn't sticking to the bottom of the pan. You don't need to stand there either and watch it, just make sure once it comes to a boil that it won't boil over and if it looks like it will, just turn it down a bit...

Oh, once you put your pot of chicken on the stove, make sure you pick up the bottom pieces of chicken, it likes to suction itself to the bottom of the pan, then it gets stuck, again, not a pretty stick, or fun thing to clean!

I take my tongs and pick a piece and kinda break it to see if it's done, depending on how many pieces you have, 30 minutes may be long enough, other times, you need it for the full 45 minutes.

Turn the burner off and let sit for 15-20 minutes.

Take a chicken breast out of the pan, place on a cutting board and cut in desired pieces.

I like to just put it in little sandwich baggies as I go along, I don't measure how much I put in. Most recipes call for a cup or 2, so you could put 1 cup in every baggie if you want. I just put in how much I would normally add to a chicken recipe.

Then I put all the sandwich baggies in a big gallon size and then place in freezer.

It's very easy to pull out a bag at a time! ;)


Place chicken breasts in pan


Place enough water in to cover the tops. You want to make sure there is enough water in there so the chicken will stay covered while boiling, but not too much where it will overflow once it starts to boil. This is where you will want to watch it to make sure it won't boil over, if it does, take a glass and get some water out. Once it starts to boil, you can just let it, as long as you know it won't boil over!


Place somewhat cooled chicken on cutting board


Cut up chicken ready to be placed in baggies!

By the way, I do the same thing with hamburger (Or if you use ground turkey, same thing), I brown it all, drain it, cool it, place in baggies. If I want meatballs, I'll make a double batch when I make them, place half in the oven to cook, or however I decide to cook them, then the others on a waxed paper covered cookie sheet, into the freezer, then once you know they will keep their shape and are half frozen, place in gallon size baggie, back into the freezer.

Monday, March 22, 2010

Horton Cake


(there is a piece of green missing that my little birthday girl decided to try! Oh well!!! LOL)

So friend told me about this contest going on... She told me I HAD to enter, so I did... Here's the link if you want to vote for me! :) I am not saying you HAVE to, but hey, whatever! :)
http://family.go.com/2010-cake-contest/animals_and_characters/horton-23874/

You have to enter some info, but it's free...
Thanks for voting!!! :)